
- Before You Start
- Materials & Tools Needed
- Step 1 — Plan the Layout & Measure the Area
- Step 2 — Remove Existing Grass & Excavate
- Step 3 — Install Weed Barrier & Edging
- Step 4 — Add & Compact the Base Rock
- Step 5 — Roll Out & Cut the Turf
- Step 6 — Seam the Turf Sections
- Step 7 — Secure the Perimeter & Fasten
- Step 8 — Apply Infill & Brush the Turf
- Step 9 — Final Inspection & Cleanup
- Pro Tips & Common Mistakes
- FAQs
Before You Start
Artificial turf has become a popular choice for homeowners who want a lush, green lawn without the watering, mowing, and fertilizing that real grass demands. Professional turf installation costs $8–$14 per square foot installed. A 500 sq ft backyard runs $4,000–$7,000 professionally. DIY materials for the same project cost $3–$6 per square foot — saving $1,500–$4,500+ in labor, depending on base conditions and project size.
This guide covers installing a standard residential turf lawn over an existing grass area — base excavation, compaction, turf laying, seaming, and infill. The same principles apply to dog runs and putting greens with minor adjustments to base depth and infill type. Use our artificial turf material calculator to work out exactly how much turf, base rock, infill, and fasteners your specific project needs before shopping for materials.
Turf vs Real Grass — When to Choose Each
| Factor | Artificial Turf | Real Grass |
|---|---|---|
| Upfront cost | Higher ($3–$6/sq ft materials) | Lower (sod runs $0.30–$0.85/sq ft) |
| Maintenance | Occasional rinse + infill top-off | Regular mowing, watering, fertilizing |
| Lifespan | 15–20 years | Ongoing, self-renewing |
| Water use | None after installation | Significant, especially in dry climates |
| Appearance | Consistent, uniform year-round | Natural, but varies with season and care |
| Heat | Can get hot in direct summer sun | Stays cooler underfoot |
| Best for | Low-maintenance lawns, pet areas, dry climates | Large properties, natural look, cooler climates |
Use our Artificial Turf Material Calculator to get an exact quantity breakdown — turf, base rock, infill, and fasteners — based on your area's actual length and width, not just square footage. Seam count depends on both dimensions, so this step matters more than it seems.
Materials & Tools Needed
The list below covers a 500 sq ft (25 × 20 ft) backyard turf installation with a standard 3-inch base and basic landscape infill. Use our artificial turf material calculator to price your specific dimensions.
Materials
| Component | Purpose | Qty for 500 Sq Ft |
|---|---|---|
| Artificial turf (15 ft roll width) | Finished surface | ~36 linear ft (535 sq ft w/ waste) |
| Crushed rock base | Structural sub-base, 3" depth | ~4.6 cubic yards (~5 tons) |
| Weed barrier fabric | Prevents weed growth through turf backing | 500 sq ft |
| Bender board / metal edging | Frames the perimeter, contains base material | ~90 linear ft (perimeter) |
| Infill (silica sand or similar) | Weights blades upright, aids drainage | ~625 lbs (13 bags of 50 lb) |
| Seam tape + seam glue | Joins turf sections at seams | ~25 linear ft tape + 1 tube glue |
| 6-inch common nails | Fastens turf perimeter and field | ~17.5 lbs |
Tools
- Layout — stakes, mason's line, tape measure, spray paint
- Excavation — sod cutter (rental, $60–$90/day) or flat shovel, wheelbarrow, rake
- Compaction — plate compactor (rental, $70–$100/day) — not optional, do not skip
- Cutting — sharp utility knife with plenty of extra blades, straightedge
- Seaming — seaming iron or roller, stiff putty knife for glue application
- Infill spreading — drop spreader or push broom, stiff power broom or landscape rake
- Fastening — hammer or pneumatic nailer, knee pads
- Safety — work gloves, knee pads, eye protection (for cutting)
Base rock must be compacted to roughly 90% density before turf goes down. Skipping this step, or compacting by foot traffic alone, leads to dips and unevenness that show through the finished turf within months. A rented plate compactor ($70–$100/day) does this properly in a fraction of the time hand-tamping would take, and it's the single piece of equipment worth renting even on a tight budget.
Accurate measurements at the start prevent the most common turf installation mistakes — ordering too little turf, misjudging seam placement, and discovering mid-project that a roll doesn't reach where it needs to.
- Measure length and width separately — don't just calculate square footage. Turf is sold in fixed roll widths (typically 12 or 15 feet), so the shape of your space, not just its area, determines how much turf and how many seams you'll need. Use our artificial turf material calculator with both dimensions entered.
- Plan roll direction and seam placement — rolls should run along the longer dimension of the space when possible, minimizing the number of seams. Sketch the layout on paper before cutting anything.
- Mark the perimeter with stakes and string — outline the exact finished edge of the turf area. This becomes your reference line for excavation depth and edging placement.
- Call 811 before any digging — utility locate service is free and required before excavation. Call at least 3 business days ahead. Even shallow excavation for turf base can strike irrigation lines or shallow utilities.
- Check for existing irrigation — any sprinkler heads in the turf area need to be capped or removed before excavation begins. Mark their locations now so you don't forget mid-project.
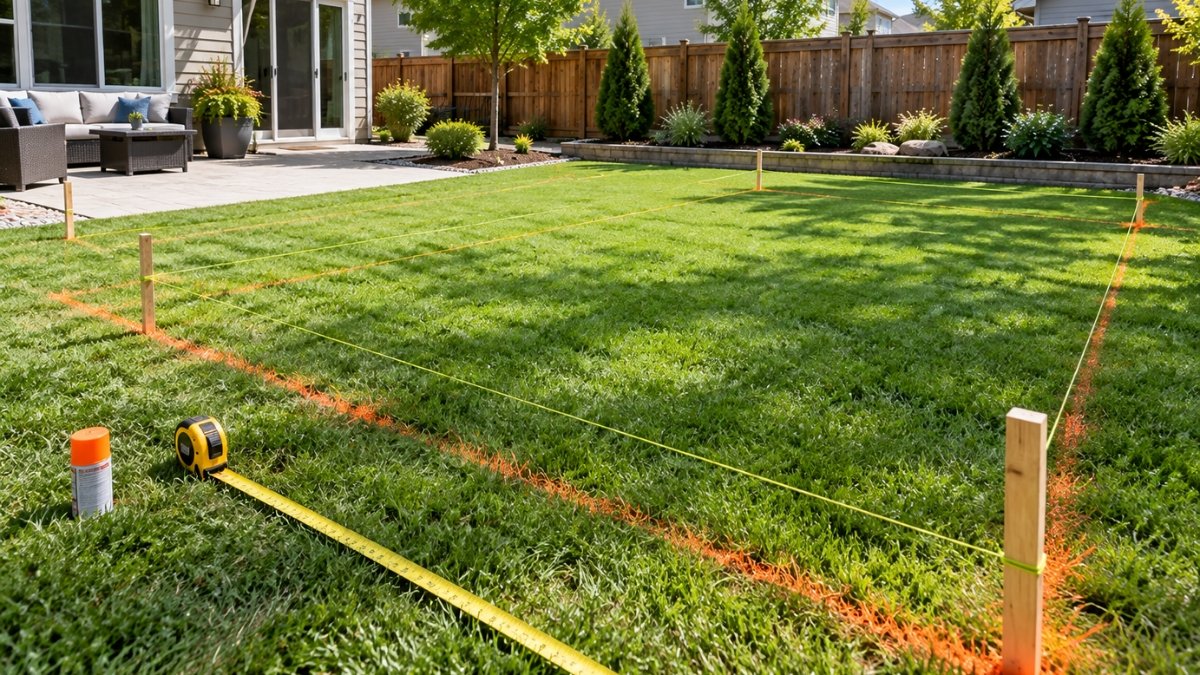
Because turf comes in fixed roll widths, a measurement error here can mean an entire extra roll purchase later — turf is not typically returnable once cut. Measure the space at least twice, from two different reference points, before finalizing your order quantity.
Converting from a natural lawn means removing the existing grass and enough soil to make room for the base rock layer. Skipping proper excavation depth is one of the most common reasons a finished turf lawn ends up sitting higher than surrounding walkways.
- Remove existing sod — a sod cutter (rental) makes quick work of a large area, cutting the grass into manageable strips for removal. For smaller areas, a flat spade works but takes considerably longer.
- Excavate to the correct depth — remove soil to a total depth of 3–4 inches below the desired finished turf height, accounting for both the base rock layer and the turf thickness itself.
- Haul away or repurpose the removed material — old sod and soil can sometimes be used to fill low spots elsewhere in the yard, or need to be hauled away. Plan for this before you start digging.
- Check for proper drainage slope — the excavated area should slope very slightly (about 1–2% grade) away from the house or any structure, so water drains correctly beneath the turf rather than pooling.
- Remove rocks, roots, and debris — rake through the excavated area thoroughly. Sharp rocks or roots left in place can work their way up through the base and eventually puncture the turf backing.
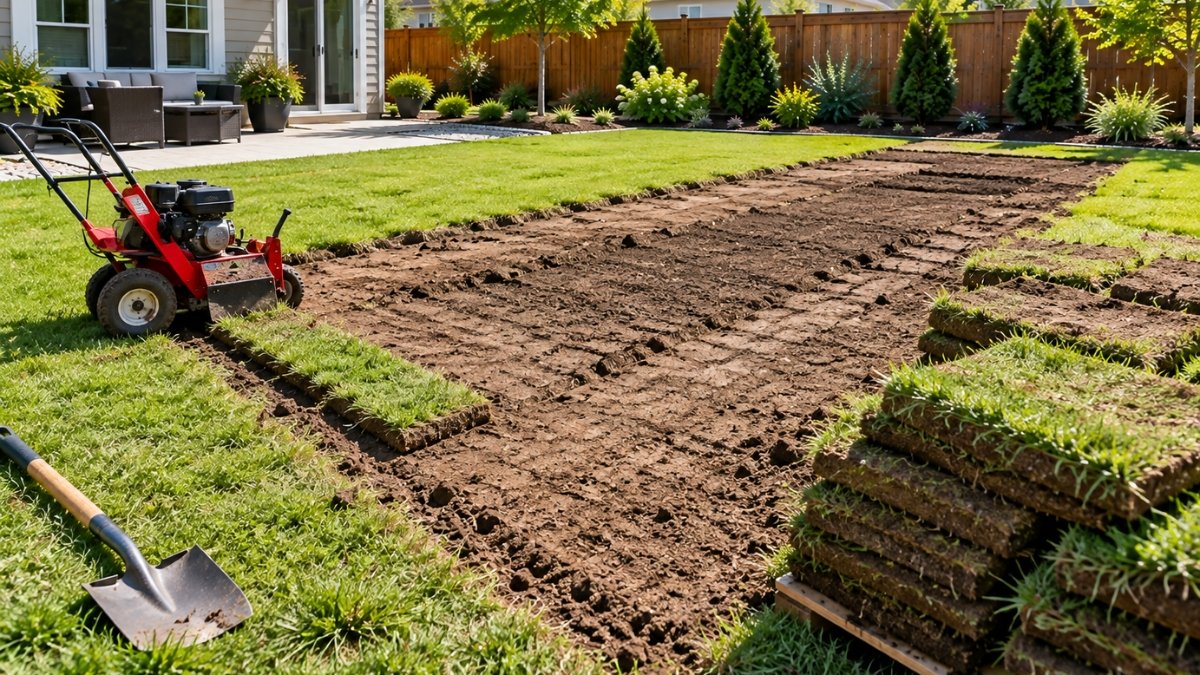
A perfectly flat or improperly sloped excavation traps water underneath the turf, leading to standing puddles, odor (especially in pet areas), and premature base failure. Even a subtle 1–2% slope away from structures makes a real difference in how the finished lawn performs after rain.
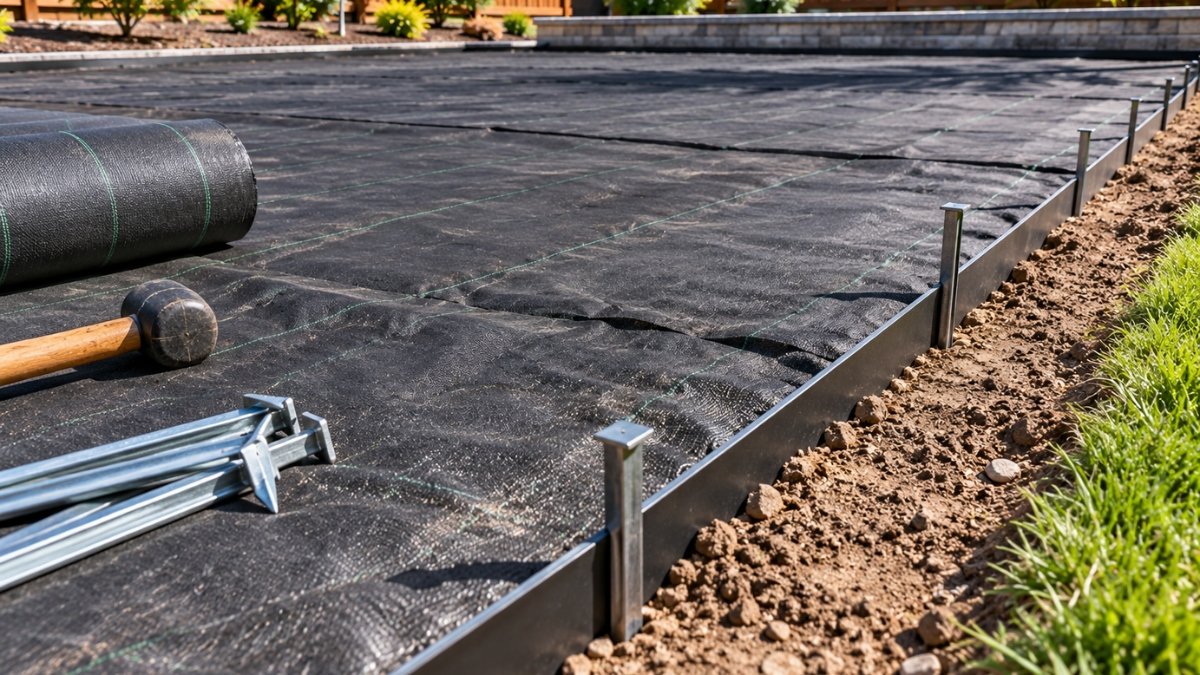
These two components are easy to skip when working from memory, but both genuinely matter for how the finished lawn looks and performs for years, not just on install day.
- Lay weed barrier fabric across the entire excavated area — overlap seams by at least 6 inches to prevent weeds from finding a gap to grow through. This layer sits directly on the exposed soil, beneath the base rock.
- Install bender board or metal edging around the perimeter — this frames the turf area and keeps base rock and infill from migrating outward into surrounding beds or walkways over time. Stake the edging securely every 2–3 feet.
- Set edging height to match the finished turf height — the top of the edging should sit flush with, or very slightly below, where the top of the finished turf will land, so the transition looks clean rather than creating a visible lip.
- Double-check the perimeter line against your original layout — edging placement is far more difficult to adjust once the base rock is in, so confirm it matches your Step 1 string line before moving on.
The base rock layer is the structural foundation the entire turf lawn sits on. This is the step most responsible for whether the finished lawn feels solid and drains properly, or develops soft spots and dips within the first year.
- Spread crushed rock evenly across the area — a standard depth is 3 inches for typical landscape use, or 4 inches for pet areas and high-traffic zones needing better drainage. Use our artificial turf material calculator to confirm your exact tonnage.
- Work in lifts for deeper applications — if you're installing more than 3 inches of base, spread and compact it in two separate passes rather than one thick layer, which compacts unevenly.
- Compact thoroughly with a plate compactor — run the compactor across the entire area in overlapping passes, then run it again in a perpendicular direction. Aim for roughly 90% density — the surface should feel solid and show no give when walked on.
- Check the final grade — use a long, straight board and a level to confirm the compacted base is smooth and consistent, with no low spots that would telegraph through the finished turf.
- Lightly water the base before final compaction — a light misting helps the rock particles settle and compact more densely than compacting bone-dry material.
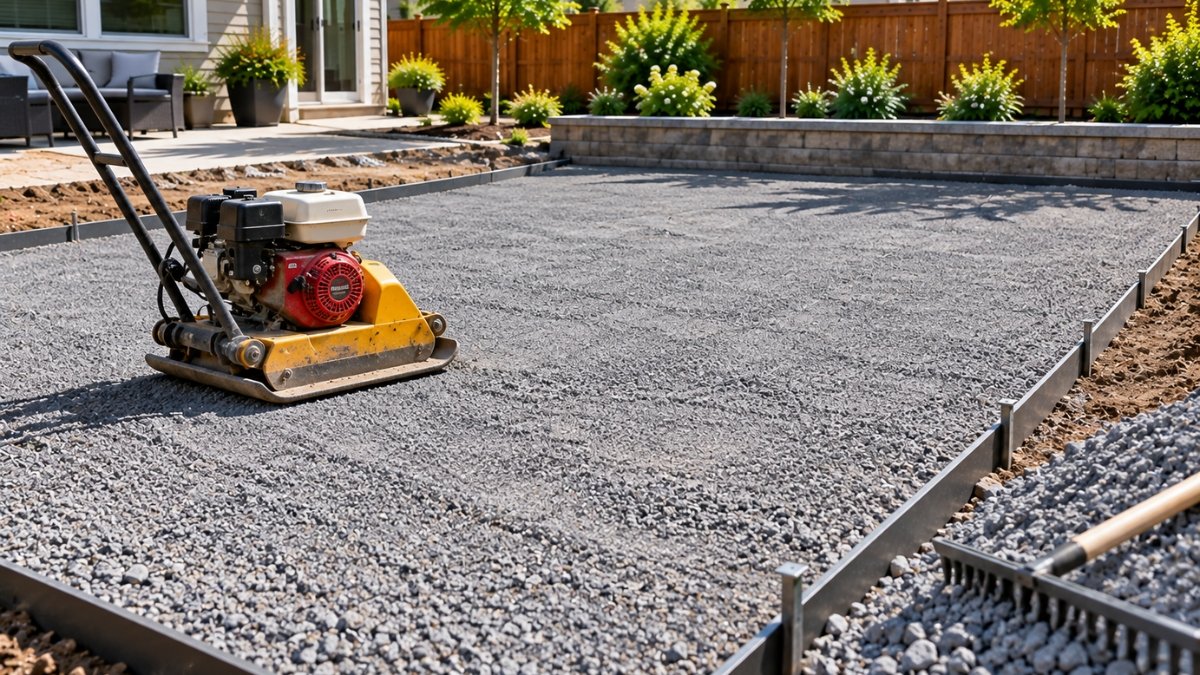
A base that looks fine right after installation but wasn't properly compacted will settle unevenly over the following months, creating visible dips, wrinkles, and soft spots in the finished turf. This step cannot be rushed or skipped — run the compactor in multiple directions and don't move on until the surface feels genuinely solid underfoot.
With the base compacted and ready, this step is where the project starts looking like a finished lawn. Working carefully here — especially around nap direction — determines how seamless the final result looks.
- Let turf rolls acclimate before cutting — unroll the turf and let it lie flat in the sun for 30–60 minutes before cutting. This relaxes the material and reduces wrinkling during installation.
- Keep the nap direction consistent across all pieces — every piece of turf has a grain, or nap, that should face the same direction across the entire project, typically toward the main viewing angle (such as from the house). Mixing nap direction creates a visible color and texture mismatch at seams.
- Position rolls according to your Step 1 layout plan — lay out all pieces roughly in place before making any permanent cuts, confirming the layout works as planned.
- Cut from the backing side, not the face — flip the turf over and cut through the backing with a sharp utility knife, using a straightedge as a guide. This keeps the blades on the face from being damaged by the cutting process.
- Trim the perimeter to fit the edging — cut each piece to fit snugly against the bender board or metal edging, leaving no gaps and no excess overlap.
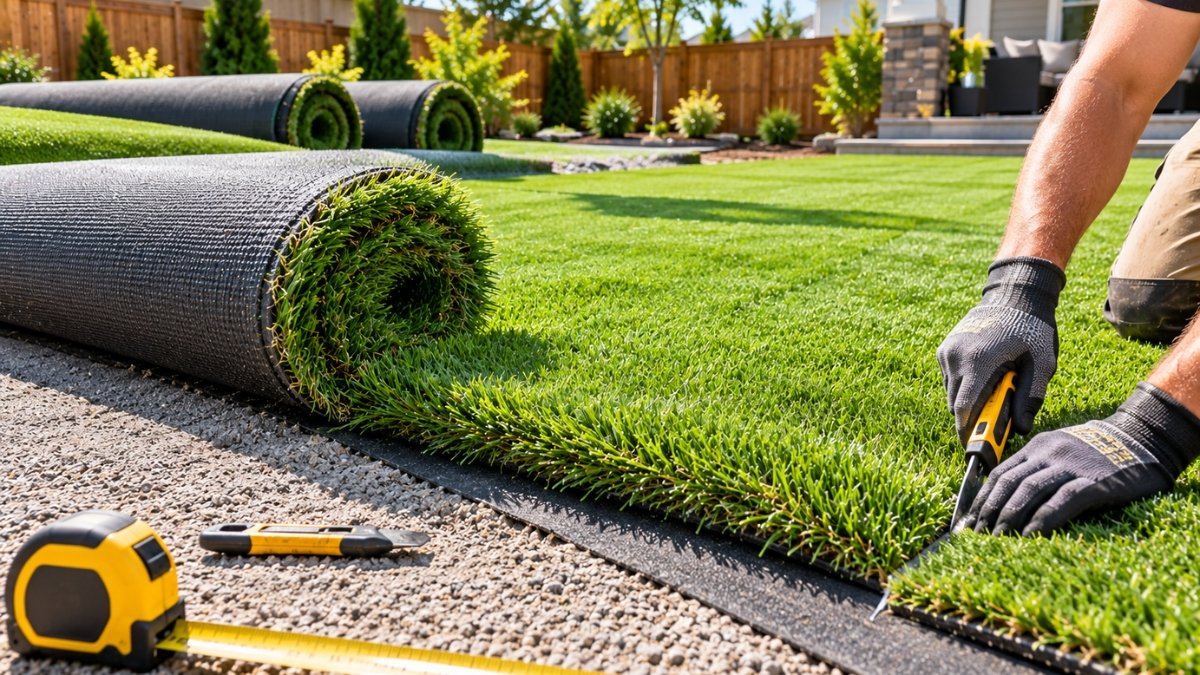
Before any rolls are cut, run your hand across each one to feel which way the blades lean, and mark an arrow in chalk on the backing of every piece. This takes a few extra minutes but prevents the frustrating discovery, after seaming, that one section was installed with its nap facing the wrong way.
Seaming is widely considered the most technically demanding step in turf installation, and it's where a rushed job becomes most visible. Take your time here.
- Fold back both edges at the seam — pull back the turf on either side of the seam to expose the base beneath, giving yourself room to work with the tape and glue.
- Center seam tape beneath the joint — lay seam tape directly under where the two turf edges will meet, with the adhesive or glue surface facing up.
- Apply seam glue to the tape — spread adhesive evenly across the tape using a notched trowel or putty knife, following the manufacturer's specific product instructions for working time.
- Press both turf edges down onto the glued tape — bring the two pieces together so the backing material meets edge-to-edge with no gap and no overlap. A gap creates a visible seam line; an overlap creates a visible ridge.
- Blend the grass blades across the seam by hand — gently comb the fibers across the joint so individual blades from each piece interlock, further hiding the seam line.
- Weight the seam while the glue cures — place sandbags or similar weight along the entire seam length per the adhesive manufacturer's cure time, typically several hours, before walking on it.
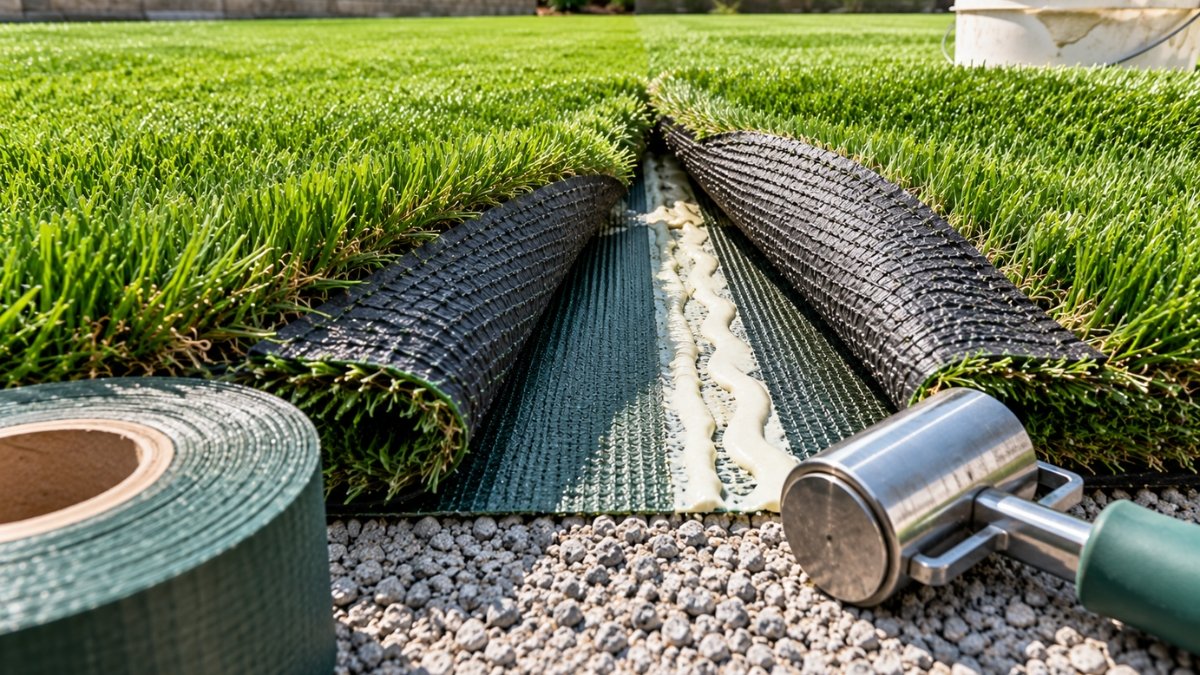
Seams need both tape and glue applied together, not tape by itself. A seam joined with tape alone is far more likely to separate under foot traffic or temperature swings. Budget for both when pricing seam materials, and don't substitute one for the other to save a small amount of money.
Proper fastening keeps the turf taut and flat over its entire lifespan, preventing the rippling and shifting that loose or under-fastened turf develops over time.
- Stretch the turf taut before fastening — using a power stretcher or by hand with a helper, pull the turf firmly toward the edges to remove any wrinkles or slack before driving the first fastener.
- Fasten the perimeter first — drive nails or staples every 3–4 inches along the entire perimeter, securing the turf firmly to the edging or ground beneath.
- Fasten the field at wider spacing — through the interior of the lawn, space fasteners every 12–24 inches in a grid pattern to hold the turf flat without over-perforating the backing.
- Angle nails slightly for better holding power — driving fasteners at a slight angle rather than straight down increases resistance to being pulled back out over time.
- Check for tautness across the whole surface — once fastening is complete, walk the entire area checking for any remaining wrinkles or loose spots, and add additional fasteners as needed.
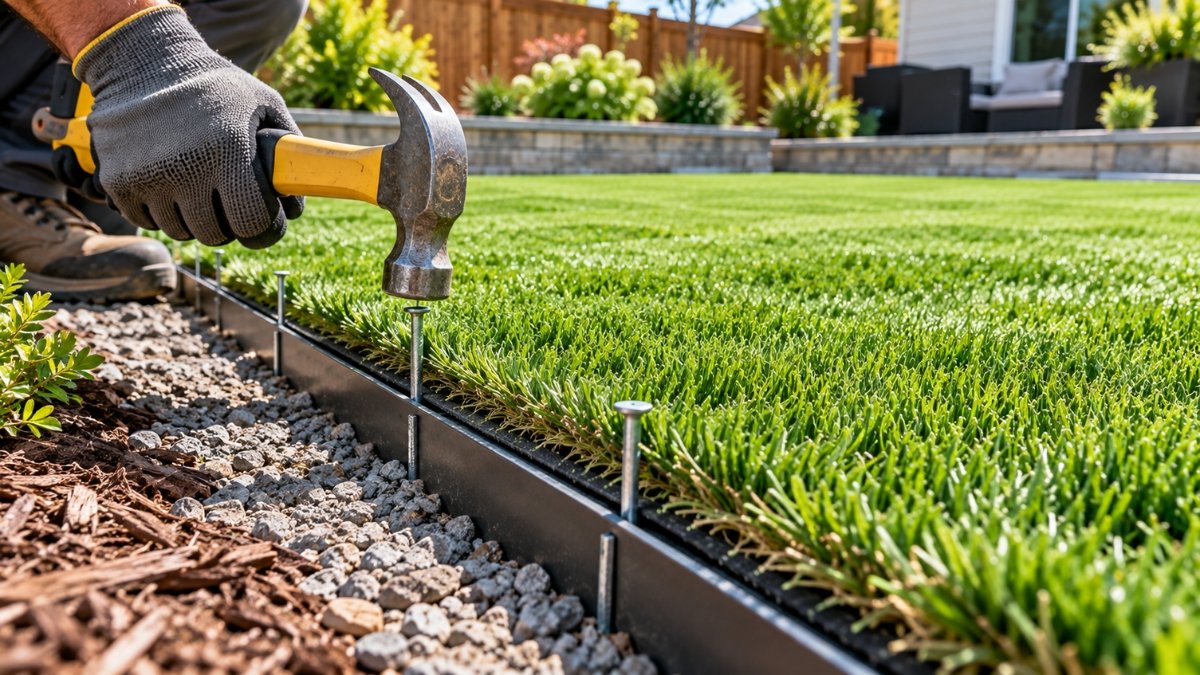
Infill is what makes finished artificial turf feel and perform like real grass underfoot — it weights the blades upright, supports drainage, and protects the backing from UV damage over time.
- Choose the correct infill type for your use case — basic landscape areas need roughly 1–1.5 lbs per square foot, while pet and high-traffic areas benefit from 2–3 lbs per square foot. Use only sized, screened silica sand or a purpose-made turf infill product.
- Spread infill evenly with a drop spreader — work in a consistent pattern across the entire area, similar to spreading grass seed or fertilizer, to avoid heavy clumps in some areas and bare spots in others.
- Work infill down into the turf backing — use a stiff push broom or power broom to brush the infill down between the blades rather than leaving it sitting on top of the surface.
- Brush the turf blades upright — once infill is worked in, make several passes with a stiff broom or power brush against the nap direction to stand the blades up, giving the finished lawn its natural appearance.
- Check infill level is consistent — walk the area and check that blades stand upright evenly throughout; add more infill to any areas where blades still lie flat.
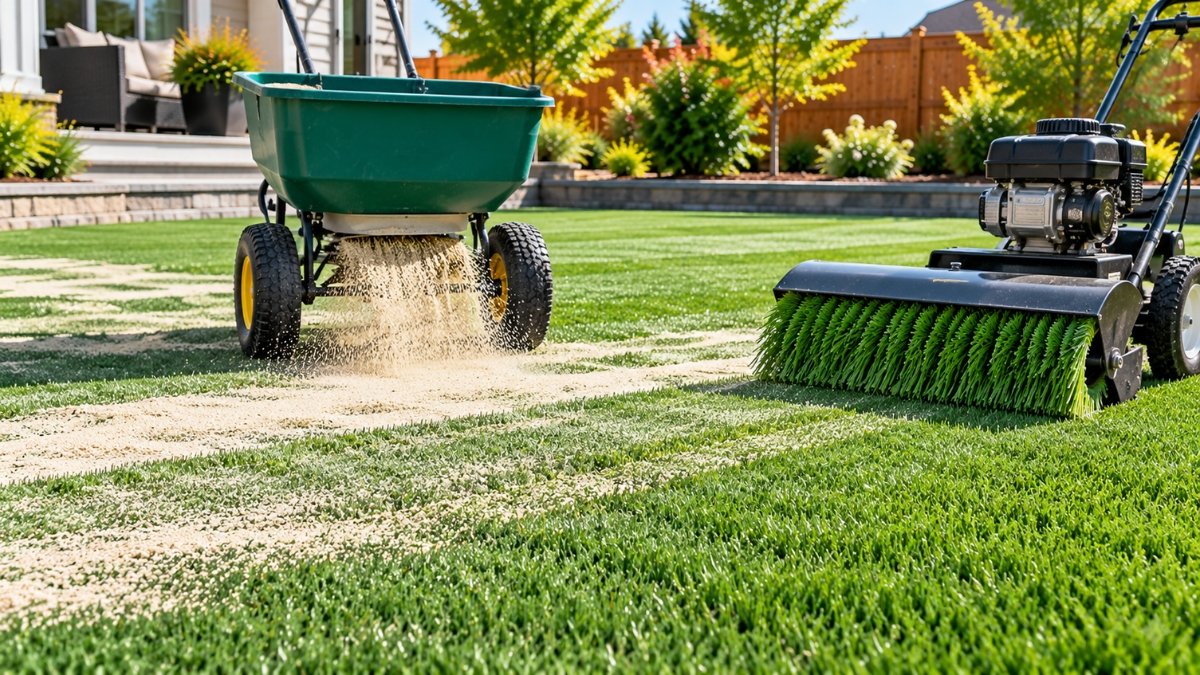
Regular sand compacts hard over time and doesn't provide the drainage turf-specific infill is designed for. Use only sized, screened silica sand, acrylic-coated sand, or a purpose-made infill product such as zeolite or an antimicrobial blend made specifically for synthetic turf.
A careful final walkthrough catches small issues while they're still easy to fix — before the project is considered done and before anyone starts using the new lawn regularly.
- Walk the entire lawn checking for wrinkles or loose spots — address any remaining issues now with additional fastening or re-stretching, since they only become more visible over time.
- Inspect every seam closely — look for any gaps, overlaps, or lifting at the edges. Press down firmly on each seam to confirm it's fully bonded.
- Check perimeter edging for secure attachment — confirm all edging stakes are driven fully and the turf meets the edging cleanly with no visible gaps.
- Clean up excess infill and debris — sweep any spilled infill off hardscape areas and remove construction debris, offcuts, and packaging from the site.
- Rinse the turf — a light hose-down settles any remaining loose infill dust and gives the finished lawn a clean first look.
- Document the project — take photos of the finished lawn and, if possible, of the base and drainage layer before it was covered. This is useful if any issues arise later or if you ever need to explain the installation to a future buyer.
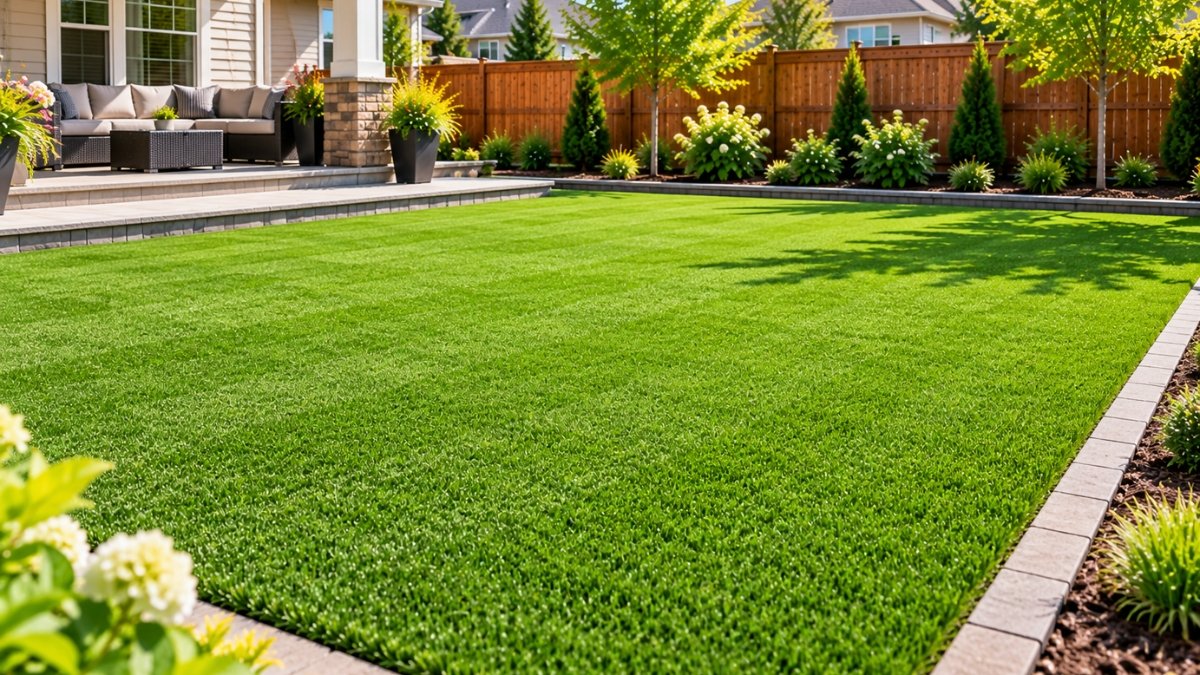
A properly installed turf lawn needs very little upkeep for 15–20 years — an occasional rinse, periodic brushing against the nap to keep blades upright, and infill top-off every few years as it naturally settles. See how your project cost compares with professional installation using our artificial turf material calculator.
Pro Tips & Common Mistakes
Common Mistakes to Avoid
- Under-compacting the base — the single most common cause of dips and wrinkles appearing months after installation. Compact thoroughly in multiple directions and confirm the surface feels solid underfoot.
- Using regular sand for infill — compacts hard and drains poorly compared to turf-specific infill products. Always use sized, screened silica sand or a purpose-made infill.
- Mismatching nap direction across seams — creates a visible color and texture difference where pieces meet. Mark nap direction on every piece before cutting.
- Using tape without glue at seams — seams need both together for a durable bond. Tape alone is more likely to separate under foot traffic.
- Skipping the drainage slope — a flat or improperly graded base traps water underneath the turf, leading to pooling, odor, and premature failure.
- Not capping irrigation before excavation — forgetting active sprinkler lines under the turf area means either damaging them during excavation or discovering a leak under a finished lawn later.
- Walking on fresh seams before the glue cures — disturbing a seam before full cure time can prevent it from bonding properly. Follow the adhesive manufacturer's specified cure time.
Pro Tips
- Let turf acclimate in the sun for 30–60 minutes before cutting — this relaxes the material and reduces wrinkling during installation.
- Order 7–15% extra turf beyond the calculated minimum to account for seaming waste and cutting mistakes, especially on an irregularly shaped lawn.
- Work on moderate-temperature days when possible — extreme heat can make turf harder to handle and extreme cold can make seaming adhesives cure unpredictably.
- Keep a small amount of extra infill and seam tape on hand after the project for future repairs or top-offs, since matching products exactly can be difficult years later.
- Photograph the base and drainage layer before covering it with turf — useful documentation if any issues arise later or when selling the home.
Frequently Asked Questions

Prakash
Prakash is the founder and editor of ConstructlyTools. He researches, develops, and maintains construction calculators, material estimators, cost guides, and DIY planning resources designed to help homeowners, contractors, and builders make informed project decisions.
Every calculator and guide is researched using trusted industry references, published building standards, manufacturer specifications, and reliable construction pricing sources. Each page is reviewed for formula accuracy, pricing methodology, readability, and practical usefulness before publication and is updated regularly as standards or market prices change.
Every calculator and article published on ConstructlyTools is independently reviewed for formula accuracy, pricing methodology, readability, and practical usefulness before publication. Content is updated whenever construction pricing, industry standards, or building code references significantly change.
This page was researched, written, and reviewed in accordance with our Editorial Policy.