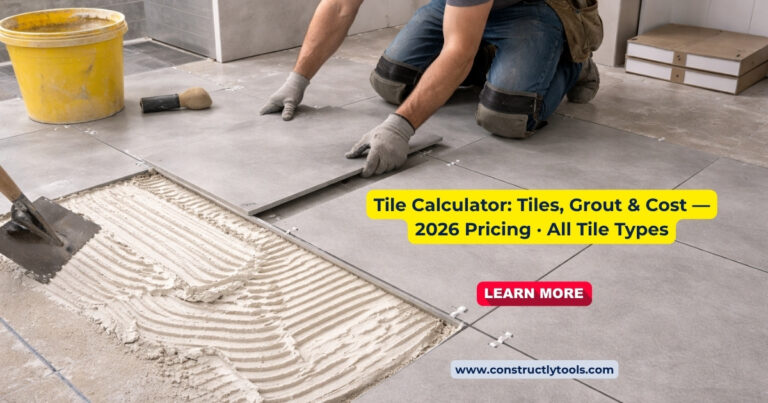
Tile Calculator
Use this free tile calculator to instantly calculate how many tiles you need for any floor, wall, backsplash, or shower. Enter your area dimensions, select your tile size (or enter a custom size), choose your grout joint width and waste factor, and get an instant tile count and material cost estimate.
Always add 10–20% for waste per TCNA guidelines · Diagonal layouts need 15–20% · Buy all tile from same lot number to avoid color variation · Round up to full boxes · Cost shown is tile only — add thinset, grout, cement board, and labor
Cost estimates based on 2026 US average tile material prices per HomeAdvisor project data. Grout, thinset, and labor are additional. Always confirm pricing with your tile supplier.
Understanding the Calculator Inputs
This calculator estimates tiles needed for any rectangular floor or wall area. For L-shaped or irregular rooms, calculate each rectangular section separately using our Square Footage Calculator and add the tile counts together.
Tile Size
Larger tiles have fewer grout lines but require a flatter, more rigid substrate and more precise installation. The most popular residential size is 12×12 inches. The trendy choice in 2026 is 12×24 or 24×24 for modern homes. The TCNA Handbook specifies substrate flatness requirements by tile size — these increase significantly for tiles over 18 inches.
Grout Joint Size
Grout joint size is set by the tile manufacturer based on the tile’s calibration (dimensional consistency). Rectified tiles (precisely cut) can use 1/16" joints. Non-rectified tiles require wider joints to compensate for slight size variations. Per ANSI A108.02, grout joint width must be at least 3 times the allowable variation in facial dimensions of the tile. Using a joint too small for non-rectified tile produces lippage (height difference between adjacent tiles).
Waste Factor
Use 10% for a simple rectangular room with straight-lay tile. Use 15% for L-shaped rooms, diagonal (45°) layouts, or rooms with multiple niches. Use 20% for herringbone, chevron, or basket weave patterns. Per TCNA guidelines, waste factors account for cuts at perimeter walls, layout adjustments, and breakage. The cost of one extra box purchased at installation is far less than reordering from a different production lot that doesn’t match.
Tile is sold in boxes. Never order the exact number of tiles. Check the shade lot (dye lot or caliber number) on the box label — every box for a single project must have the same lot number. Color variation between lots is visible and cannot be corrected after installation.
3 Real-World Tile Examples
Example 1 — Bathroom Floor (8×6 ft, 12×12 Porcelain, Straight Lay, DIY)
Standard master bathroom floor — 48 sq ft, 12×12 inch porcelain tiles, 10% waste, cement board substrate already installed.
8 × 6 = 48 sq ft × 1.10 = 52.8 sq ft → 53 tiles (12×12 = 1 sq ft each)
Grout (0.5 lbs/sq ft for 12×12 at ⅛" joint per TCNA):53 × 0.5 = ~27 lbs grout (2 bags, 10 lb each + extra)
| Item | Qty | Unit Cost | Total |
|---|---|---|---|
| Porcelain tile (53 sq ft, round up to box) | ~60 sq ft (3 boxes of 20) | $3–$8/sq ft | $180–$480 |
| Thinset adhesive (50 lb bag covers ~40 sq ft) | 2 bags | $22–$35/bag | $44–$70 |
| Unsanded grout (2 × 10 lb bags) | 20 lbs | $18–$28/bag | $36–$56 |
| Tile spacers (1/8", bag of 100) | 1 bag | $5–$10 | $5–$10 |
| Grout sealer (spray, 12 oz) | 1 | $10–$18 | $10–$18 |
| Tile wet saw rental (1 day) | 1 day | $60–$90 | $60–$90 |
| Total DIY materials + rental | $335–$724 | ||
| Professional installed | $600–$1,200 | ||
Real-world note: Before tiling a bathroom floor, confirm the subfloor is stiff enough — the TCNA and ANSI A108.01 require L/360 deflection or less. Stand in the center and jump lightly — if you can feel any bounce, stiffen it with additional blocking or a cement board layer before tiling. A deflecting subfloor causes grout cracking within months regardless of tile or adhesive quality. This is the single biggest cause of tile floor failures on wood-framed floors.
Example 2 — Kitchen Floor (14×12 ft, 24×24 Porcelain, Diagonal Lay, Contractor)
Modern kitchen floor with large format 24×24 inch porcelain tiles in a diagonal (45°) layout — 168 sq ft, 15% waste factor for diagonal cuts.
14 × 12 = 168 sq ft × 1.15 = 193 sq ft
24×24 tiles (4 sq ft each):193 ÷ 4 = 48.25 → 49 tiles
Grout (0.35 lbs/sq ft for 24×24 at ¼" joint):193 × 0.35 = ~68 lbs (4 bags × 20 lb)
| Item | Qty | Unit Cost | Total |
|---|---|---|---|
| 24×24 porcelain (193 sq ft ordered) | ~200 sq ft | $5–$12/sq ft | $1,000–$2,400 |
| Large format thinset (back-butter required) | 5 bags (50 lb) | $28–$40/bag | $140–$200 |
| Sanded grout (¼" joint, 4 bags × 20 lb) | 80 lbs | $18–$28/bag | $72–$112 |
| Labor — large format diagonal tile (168 sq ft) | 168 sq ft | $8–$14/sq ft | $1,344–$2,352 |
| Self-leveling underlayment (floor prep) | 168 sq ft | $0.50–$1.50/sq ft | $84–$252 |
| Total contractor installed | $2,640–$5,316 | ||
Real-world note: Large format tiles (24"+) require substrate flatness of ⅛" over 10 feet per TCNA/ANSI A108.01 requirements — measured with a 10-foot straightedge. Most residential wood-framed floors need self-leveling underlayment before large format tile. Large format tiles must also be back-buttered (thinset applied to both floor and tile back) to achieve the required 95% adhesive contact per ANSI A108.5. Diagonal layouts add 15–20% material waste and significantly more labor time.
Example 3 — Shower Wall (3 walls, 5×7 ft each, 3×12 Subway Tile, Contractor)
Full shower tile installation — 3 walls, each 5 ft wide × 7 ft high, 3×12 inch white subway tile, running bond pattern, 3/8" grout joints.
3 × 5 × 7 = 105 sq ft
Add 15% waste (cuts around niches, corners):105 × 1.15 = 121 sq ft → 484 tiles (0.25 sq ft each)
Grout (~1.0 lbs/sq ft for 3×12 at 3/8" joint):121 × 1.0 = ~121 lbs grout (7 bags × 20 lb)
| Item | Qty | Unit Cost | Total |
|---|---|---|---|
| 3×12 subway tile (order 130 sq ft) | 130 sq ft | $2–$8/sq ft | $260–$1,040 |
| Cement board (HardieBacker, shower walls) | 105 sq ft | $0.85–$1.20/sq ft | $89–$126 |
| White thinset (3 bags × 50 lb) | 150 lbs | $25–$40/bag | $75–$120 |
| Sanded grout (7 bags × 20 lb) | 140 lbs | $18–$28/bag | $126–$196 |
| Waterproofing membrane (RedGard/Kerdi) | 105 sq ft | $0.50–$1.00/sq ft | $53–$105 |
| Labor — shower wall tile (105 sq ft) | 105 sq ft | $8–$15/sq ft | $840–$1,575 |
| Total contractor installed | $1,443–$3,162 | ||
Real-world note: Shower walls must have a waterproofing membrane between the cement board and the tile — required by most building codes and the TCNA Handbook (Method B415 for wet areas). Tile and grout alone are not waterproof — water penetrates grout joints and without a membrane, saturates the wall assembly behind. Always use cement board (not green board drywall) in a shower, and always apply a waterproofing membrane per ANSI A118.10 before tiling.
Common Tile Sizes Guide
Tile size changes a room’s look and feel, installation difficulty, and substrate requirements. Per TCNA guidelines, substrate flatness requirements increase significantly for tiles 15" and larger.
| Tile Size | Sq Ft / Tile | Best Application | Subfloor Requirement | Notes |
|---|---|---|---|---|
| 2×2 in (mosaic) | 0.028 | Shower floors, accent bands | Standard | Sold on 12×12 mesh sheets; slip resistant on shower floors |
| 4×4 in | 0.11 | Backsplash, shower walls | Standard | Classic look; easy to cut and handle |
| 6×6 in | 0.25 | Small bathroom floors, shower floors | Standard | Conforms to curves; good for small areas |
| 12×12 in | 1.00 | Kitchen floors, bathrooms, entryways | Standard (L/360) | Most popular size; versatile |
| 12×24 in | 2.00 | Bathrooms, showers, modern homes | Flat — ¼" in 10 ft | Trending plank look; fewer grout lines |
| 18×18 in | 2.25 | Living rooms, open plan areas | Flat — ¼" in 10 ft | Fewer grout lines; easier to clean |
| 24×24 in | 4.00 | Large living areas, commercial | Flat — ⅛" in 10 ft (TCNA) | Very modern; needs very flat substrate |
| 3×12 in (subway) | 0.25 | Backsplash, shower walls, accents | Standard | Timeless classic; running bond is standard |
Large format tiles reveal subfloor imperfections that smaller tiles hide. Per TCNA Handbook, anything 15" or larger requires flatness of ¼" over 10 feet. Most residential floors need self-leveling underlayment or additional prep before large format installation at $0.50–$1.50/sq ft applied. The reward: dramatically fewer grout lines and a far more contemporary appearance.
Tile Types Guide
The wrong tile type in the wrong application fails quickly — ceramic on outdoor patios cracks in freeze-thaw climates, mosaic glass on a floor slips when wet, and unsealed natural stone stains permanently. Match the tile type to the application.
| Type | $/Sq Ft (2026) | Durability | Best For | Never Use For |
|---|---|---|---|---|
| Ceramic | $0.50–$5 | Good | Walls, backsplashes, light residential floors | Outdoor in freeze-thaw, heavy traffic |
| Porcelain | $3–$10 | Excellent | All floors, showers, outdoor, high traffic | Nothing — most versatile tile type |
| Marble | $8–$25 | Good — needs sealing | Luxury bathrooms, feature walls | Kitchen floors (acid etching from spills) |
| Travertine | $4–$12 | Good — needs sealing | Floors, bathrooms, pool areas | Areas with acidic cleaners |
| Slate | $4–$14 | Very Good | Floors, outdoor, entryways | Showers without sealing |
| Mosaic / Glass | $8–$30 | Good (walls) | Backsplash, shower wall accents | Floor traffic areas (glass is slippery) |
| Cement / Encaustic | $6–$20 | Good — seal required | Decorative floors, patios, feature walls | Wet areas without proper sealing |
| Luxury / Designer | $15–$50+ | Varies | Feature walls, high-end bathrooms | Check manufacturer specs per product |
PEI Rating — Critical for Floor Tiles
The Porcelain Enamel Institute (PEI) rating measures a tile’s hardness and suitability for foot traffic. Always check PEI rating before using any tile on a floor.
- PEI 0–1 — wall tiles only. Never use on floors.
- PEI 2 — light residential floors with soft footwear. Not for kitchens or entryways.
- PEI 3 — standard residential floors. Most bathroom and kitchen floor tiles fall here.
- PEI 4 — heavy residential and light commercial. Good for entryways, kitchens, and high-traffic areas.
- PEI 5 — commercial heavy traffic. Retail, restaurants, and high-traffic commercial applications.
Porcelain is fired at higher temperature (1,200–1,400°C vs 1,000°C for ceramic), making it denser, harder, and less porous — water absorption under 0.5% per ANSI A137.1 vs ceramic’s 3–7%. Porcelain can go anywhere: floors, showers, outdoor, freeze-thaw climates. Never use ceramic outdoors in climates that freeze — the moisture it absorbs expands when frozen and cracks the tile. For any wet area, floor, or outdoor application, always choose porcelain with a PEI rating of 3 or higher.
Grout Guide & Quantities
Grout fills the joints between tiles and is the most visible part of a finished tile installation. The right grout type and color make a dramatic difference. Per ANSI A118.6 specifications, grout type must match the joint width.
How Much Grout Do You Need?
| Tile Size | Joint Size | Grout Needed | Grout Type (ANSI A118.6) | 100 sq ft needs |
|---|---|---|---|---|
| 4×4 in | ⅛ in | ~1.5 lbs/sq ft | Unsanded | ~150 lbs (8 bags) |
| 6×6 in | ⅛ in | ~1.0 lbs/sq ft | Unsanded | ~100 lbs (5 bags) |
| 12×12 in | ⅛ in | ~0.5 lbs/sq ft | Unsanded | ~50 lbs (3 bags) |
| 18×18 in | 3/16 in | ~0.4 lbs/sq ft | Sanded | ~40 lbs (2 bags) |
| 24×24 in | ¼ in | ~0.35 lbs/sq ft | Sanded | ~35 lbs (2 bags) |
| 3×12 subway | 3/8 in | ~1.0 lbs/sq ft | Sanded | ~100 lbs (5 bags) |
| Mosaic 1×1 | 1/16 in | ~3.0 lbs/sq ft | Unsanded | ~300 lbs (15 bags) |
Grout Types (per ANSI A118.6)
- Unsanded grout — for joints under ⅛ inch. Required for polished stone and glass tiles where sanded grout scratches the surface.
- Sanded grout — for joints ⅛ inch and wider. Sand particles prevent shrinkage cracking in wider joints. Standard for most floor applications.
- Epoxy grout — completely waterproof, stain-proof, and chemical resistant per ANSI A118.3. Required for commercial kitchens; ideal for shower floors and kitchen countertops. Costs 3–4× more than cementitious grout. Produces the most consistent, long-lasting color.
Seal all sanded and unsanded grout 72 hours after installation and annually in showers, every 2–3 years on floors. Unsealed grout is porous — it absorbs oils, food, and water, producing permanent staining and allowing water to penetrate behind tile. Epoxy grout (ANSI A118.3) never needs sealing. Apply penetrating sealer with a small brush along grout lines — wipe excess off tile faces immediately.
Full Tile Cost Breakdown (2026)
Complete all-in costs for a standard 100 sq ft floor tile project per HomeAdvisor 2026 data. Material costs are for tile only — thinset, grout, cement board, and labor are separate.
| Tile Type | Material/Sq Ft | 100 Sq Ft Materials | Labor Only | All-In Installed |
|---|---|---|---|---|
| Ceramic (12×12) | $0.50–$5 | $55–$550 | $4–$7/sq ft | $700–$1,500 |
| Porcelain (12×12) | $3–$10 | $330–$1,100 | $5–$8/sq ft | $1,000–$2,400 |
| Porcelain (24×24, diagonal) | $5–$12 | $575–$1,380 | $8–$14/sq ft | $1,800–$3,800 |
| Travertine | $4–$12 | $440–$1,320 | $5–$9/sq ft | $1,200–$3,000 |
| Natural Stone / Marble | $8–$25 | $880–$2,750 | $7–$12/sq ft | $1,800–$4,500 |
| Mosaic / Glass | $8–$30 | $880–$3,300 | $8–$15/sq ft | $1,800–$5,500 |
Additional Materials (not tile)
| Material | Coverage | Cost | Notes |
|---|---|---|---|
| Thinset adhesive (50 lb bag) | ~40–50 sq ft | $22–$40/bag | Use white thinset under light-colored tile (ANSI A118.1) |
| Cement board (HardieBacker) | 3×5 ft sheet = 15 sq ft | $12–$18/sheet | Required substrate for all wet areas |
| Waterproofing membrane | per sq ft | $0.50–$1.50/sq ft | Required in shower and tub areas (ANSI A118.10) |
| Self-leveling compound | 50 lb bag covers ~40 sq ft at ¼" | $35–$55/bag | Required for large format tile on uneven floors (TCNA) |
| Grout sealer | Spray can covers ~100 sq ft | $10–$20 | Apply 72 hrs after grout cures |
| Tile spacers | Bag of 100 | $5–$12/bag | Match to your grout joint size selection |
Subfloor & Substrate Guide
The substrate under tile is as important as the tile itself. The most common cause of tile failure — cracked tiles, popped tiles, cracked grout — is inadequate substrate preparation. Tile is rigid and requires a stable, flat, structurally sound base per TCNA and ANSI A108.01 standards.
| Substrate Type | Application | Cost | Notes |
|---|---|---|---|
| Cement board (HardieBacker, Durock) | Floors, walls, showers | $0.85–$1.20/sq ft | Standard for all wet areas; fastened to framing |
| Schluter Ditra (uncoupling membrane) | Floors over wood | $1.50–$2.50/sq ft | Allows floor to flex without cracking tile; excellent for wood frames |
| Existing concrete slab | Ground-level floors | Free (if sound) | Must be flat, cured ≥28 days, free of cracks and contamination |
| Existing tile (tile-on-tile) | Renovation only | $0 extra | Only if flat, firmly bonded, and adds less than ¼" height. Not ideal. |
| Plywood (dry areas only) | Dry areas only | $1–$2/sq ft | Some installers use in dry areas; adds height; flexes more than cement board |
The Deflection Test — Critical Before Tiling Wood Floors
The TCNA and ANSI A108.01 require the floor-to-span deflection to be L/360 or less — for a 10-foot span, maximum deflection of 0.33 inches. Stand in the center of the room and jump gently — any bounce or flex means the subfloor must be stiffened before tiling. This step is often skipped and is the most common cause of tile failures on residential wood floors. Adding blocking, additional framing, or a thicker subfloor layer corrects this before tiling.
Hidden Costs Most Tile Estimates Miss
1. Substrate Preparation
Cement board installation (required before tile per TCNA for all wet areas) adds $0.85–$1.50/sq ft in materials and $1.50–$3.00/sq ft in labor — often not included in a tile installation quote that assumes existing cement board. On a 100 sq ft bathroom, that’s $235–$450 in substrate prep alone. Always ask your tile contractor: “Does this quote include cement board installation?”
2. Waterproofing Membrane for Shower
Liquid-applied waterproofing per ANSI A118.10 (RedGard, Laticrete, or similar) is required between cement board and tile in all wet areas. This costs $0.50–$1.50/sq ft applied. On a 3-wall shower (105 sq ft), that’s $53–$158 in material that won’t be in a tile-only quote. Sheet membranes (Schluter Kerdi) cost $2.50–$4.00/sq ft but provide more reliable coverage. Without a membrane, shower leaks are a matter of when, not if.
3. Thinset Adhesive
Thinset costs $22–$40 per 50 lb bag per ANSI A118.1 specifications covering approximately 40–50 sq ft — adding $44–$100 to a 100 sq ft project. Commonly left out of tile-material-only quotes. For large format tiles requiring back-buttering (ANSI A108.5 requires 95% contact), consumption increases by 30–50%.
4. Tile Wet Saw Rental for DIY
Cutting tile cleanly requires a wet saw. Wet saw rental costs $60–$90/day. Most tile projects span 2–3 days for DIY installation — budget $120–$270 for saw rental. Trying to cut porcelain with a manual snap cutter produces chipped, inaccurate cuts. For large format tiles, only a wet saw produces acceptable results.
5. Grout Color Variation
Running out of grout mid-project and buying more from a different production batch produces visible color variation. Grout bags are marked with lot numbers — always buy all grout at once. Under-ordering by even one bag and buying a replacement produces a clearly visible seam where the two batches meet. Always buy 15–20% more grout than calculated.
Common Tile Installation Mistakes
Not Checking Subfloor Deflection
Tiling over a flexible wood-framed floor without verifying L/360 deflection per TCNA/ANSI A108.01 is the most common cause of tile floor failures. Tile and grout have essentially zero flexibility — they crack when the subfloor flexes under foot traffic. The fix requires removing all tile, stiffening the floor, and retiling — often costing more than the original installation.
Using the Wrong Thinset Color
White thinset per ANSI A118.1 is required under light-colored tile, translucent tile, and any tile thinner than ¼ inch. Gray thinset showing through white or light-colored tile is a visible defect that can’t be corrected without removing the tile. Always use white thinset under: white subway tile, light marble, porcelain lighter than gray, and glass tile.
Starting in the Wrong Place
Starting from a corner wall produces uneven cut tiles at the far end — sometimes very thin slivers that look unprofessional. The correct approach per TCNA: find the center of the room, snap chalk lines, dry lay to the walls, and adjust so both walls get balanced cuts (at least half a tile wide on each side).
Skipping the Waterproofing Membrane in Showers
Tile and grout are not waterproof. Without a membrane behind shower tile (required per TCNA Handbook Method B415 and ANSI A118.10), water penetrates through grout joints over time, causing mold growth, structural deterioration, and eventually a complete shower demo and rebuild. A $50–$150 waterproofing membrane prevents a $5,000–$15,000 repair.
Buying Tile from Multiple Lots
Ordering 90% of tiles needed and going back for more from a different production lot produces visible shade variations across the finished floor. Always calculate with the correct waste factor, verify the lot number on every box at purchase, and buy all tile at once. If you must order more, ask the store to check their inventory for matching lot numbers before ordering new stock.
How We Calculate
Tiles Needed = CEILING(Area × Waste Factor ÷ Tile sq ft)
Tile square footage is calculated from the selected size (e.g., 12×12 inches = 144 sq in ÷ 144 = 1 sq ft). The CEILING function rounds up to the next whole tile — you cannot buy partial tiles. Waste factors (10%, 15%, 20%) follow TCNA installation guidelines for straight-lay, diagonal, and complex patterns respectively. Material cost multiplies the waste-adjusted area by the $/sq ft range for the selected tile type per 2026 US average retail pricing from HomeAdvisor project data.
The calculator does not include thinset, cement board, grout, waterproofing membrane, or labor in the material cost estimate. These are separate line items. See the cost breakdown section above for complete project budgeting.
Frequently Asked Questions
Plan your full renovation project with these free tools.
Interior Material Calculators
Renovation Cost Estimators
Measurement Tools
- TCNA (Tile Council of North America) — TCNA Handbook for Ceramic, Glass, and Stone Tile Installation — Industry standard for tile installation methods, substrate flatness requirements by tile size (Method B415 for wet areas, flatness tolerances for large format tiles), waste factor recommendations by layout type, and grout quantity guidance. Referenced throughout the calculator, size guide, subfloor guide, and methodology section. TCNA, current edition.
- ANSI A108 Series — Specifications for the Installation of Ceramic Tile — Multiple standards referenced: ANSI A108.01 (substrate flatness L/360 deflection requirement and 95% adhesive contact for large format tile per A108.5), ANSI A118.1 (thinset adhesive specifications, white vs gray), ANSI A118.3 (epoxy grout), ANSI A118.6 (cementitious grout types by joint width), ANSI A118.10 (waterproofing membrane requirements for wet areas). American National Standards Institute, current editions.
- ANSI A137.1 — Specifications for Ceramic Tile — Defines tile types by water absorption: porcelain (under 0.5%), ceramic (3–7%), and classification by calibration (rectified vs non-rectified). Referenced for the porcelain vs ceramic comparison, PEI rating explanations, and tile type selection guidance. American National Standards Institute, current edition.
- HomeAdvisor True Cost Guide 2026 — Tile Installation — Labor cost data by tile type and complexity (standard floor, diagonal, large format, shower wall), material cost ranges by tile type, and all-in installed cost ranges. Referenced for all cost data in the cost breakdown tables, worked examples, and FAQ answers. HomeAdvisor / Angi, 2026.
Tile pricing reflects 2026 US national average retail pricing. Significant regional variation exists — urban and coastal markets run 20–40% higher. Labor rates vary by contractor experience level, tile size, and pattern complexity. Always get 3 contractor quotes for any tile project over 100 sq ft. ConstructlyTools does not have a paid relationship with any tile manufacturer, supplier, or contractor mentioned on this page.