
- Before You Start
- Materials & Tools Needed
- Step 1 — Plan the Layout & Mark the Line
- Step 2 — Dig the Post Holes
- Step 3 — Set Posts in Concrete
- Step 4 — Allow Concrete to Cure
- Step 5 — Install the Top Rail & Fittings
- Step 6 — Hang & Stretch the Chain Link Fabric
- Step 7 — Tie Off the Fabric & Tension Wire
- Step 8 — Hang the Gate
- Step 9 — Final Inspection & Cleanup
- Pro Tips & Common Mistakes
- FAQs
Before You Start
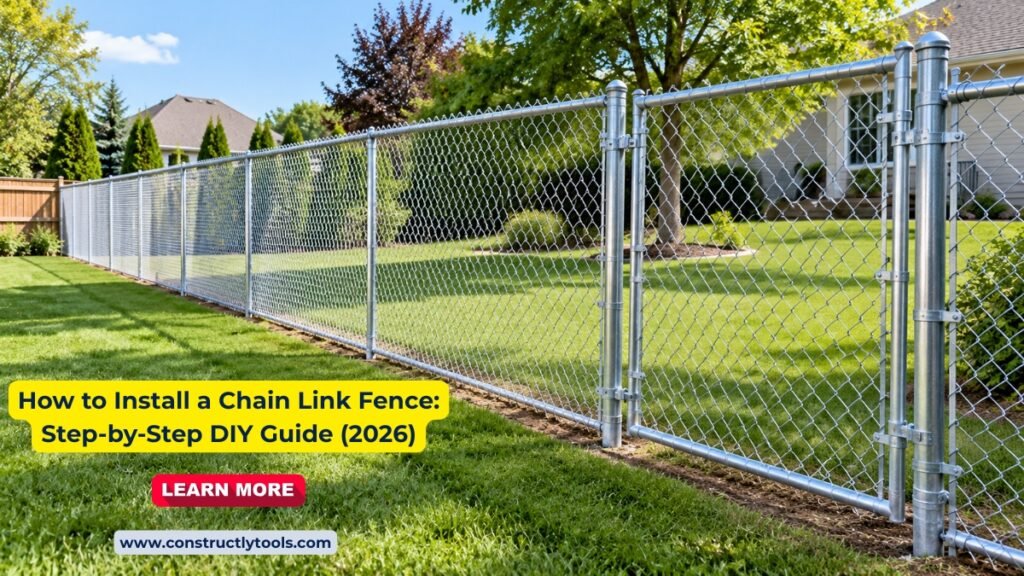
Chain link remains one of the most budget-friendly and durable fencing options available, and it's genuinely one of the more approachable fence types to install yourself — fewer precision cuts than wood or vinyl, and the main skill to learn is stretching the fabric correctly. Professional chain link installation costs $15–$30 per linear foot installed. A 150-linear-foot backyard fence runs $2,250–$4,500 professionally. DIY materials for the same fence cost $8–$15 per linear foot — saving $1,000–$3,000+ in labor.
This guide covers installing a standard 4–6 foot residential chain link fence with galvanized fabric, steel posts set in concrete, and a single walk gate. The same principles apply to taller fences and vinyl-coated fabric with minor adjustments to post size and fabric handling. Use our chain link fence cost calculator to estimate your full project cost by height, gauge, and coating before shopping for materials.
Chain Link vs Wood vs Vinyl — When to Choose Each
| Factor | Chain Link | Wood / Vinyl |
|---|---|---|
| Upfront cost | Lowest ($5–$12/linear ft materials) | Higher ($8–$35/linear ft materials) |
| Privacy | None (open mesh) unless privacy slats added | Full privacy available |
| Maintenance | Minimal — occasional rust check | Periodic staining (wood) or none (vinyl) |
| Lifespan | 15–20 years galvanized | 10–40 years depending on material |
| Install difficulty | Moderate — fabric stretching is the main skill | Moderate to high — precise cuts and panel fit |
| Best for | Budget projects, pet containment, security | Privacy, curb appeal, resale value |
Use our Chain Link Fence Cost Calculator to get a detailed estimate by height, gauge, and galvanized vs. vinyl coating at your specific linear footage. Our Linear Feet Calculator converts your measurements to linear feet if you're working with different units.
Materials & Tools Needed
The list below covers a 150 linear foot, 4-foot residential chain link fence with one 4-foot walk gate. Use our chain link fence cost calculator to price your specific run and height.
Materials
| Component | Purpose | Qty for 150 LF |
|---|---|---|
| Terminal posts (corner/end/gate) | Anchors fabric tension at direction changes | 4–6 posts (varies by layout) |
| Line posts | Supports fabric between terminal posts | ~15 posts (at 10 ft spacing) |
| Top rail (sections + couplers) | Runs along the top, stiffens the fence line | 150 linear ft + couplers |
| Chain link fabric | The mesh fencing itself | 150 linear ft roll |
| Tension bands + bars | Secures fabric to terminal posts | 1 set per terminal post |
| Rail ends, caps & brace bands | Fittings connecting rail to posts | 1 set per terminal post |
| Tie wires | Secures fabric to line posts and top rail | ~150 ties |
| Bottom tension wire (optional) | Keeps fabric bottom taut, deters digging | 150 linear ft |
| Gate frame + hardware kit | Walk gate opening | 1 gate assembly |
| 80-lb fast-setting concrete | Sets posts | ~2–3 bags per post |
Tools
- Layout — stakes, mason's line, tape measure, spray paint
- Digging — post hole digger (clamshell) or power auger rental ($80–$120/day)
- Stretching — come-along or fence stretcher bar (rental or purchase, $30–$80) — essential, not optional
- Cutting — bolt cutters (for trimming fabric), hacksaw (for posts/rail if needed)
- Leveling — 4-foot level, torpedo level, line level
- Fastening — fence pliers (for tie wires), adjustable wrench, pliers
- Safety — heavy work gloves (chain link edges are sharp), eye protection
Attempting to stretch chain link fabric by hand or with improvised tools almost always results in a fence that sags within the first year. A come-along or dedicated fence stretcher bar applies even, controlled tension across the full fabric height — genuinely the one tool on this list worth renting even on a tight budget.
Careful planning before the first post hole prevents the most costly chain link mistakes — posts in the wrong location, a gate that opens the wrong direction, and a fence line that doesn't actually match your property boundary.
- Confirm your property lines — review your property survey or plat rather than relying on existing landscaping or an old fence line. Most municipalities require a 2–6 inch setback from the property line. When in doubt, hire a surveyor ($300–$600) before starting.
- Check local ordinances and HOA rules — fence height limits, setback requirements, and permit requirements vary by municipality. Confirm before you dig, since non-compliant fences may need to come down at your expense.
- Call 811 — utility locate service is free and required before any digging, at least 3 business days ahead. Underground utility lines can be at any depth.
- Sketch the layout to scale — mark corner locations, gate position, and terminal post locations (every point where the fence changes direction). Unlike panel fencing, chain link line post spacing is flexible (typically 8–10 ft), giving you more layout freedom.
- Decide gate location and swing direction — gates should open inward in most areas. Confirm clear swing space inside the yard for the gate's full arc.
- Stretch mason's line along the fence run — stake the line at planned fence height along the entire run as your alignment reference for every post.
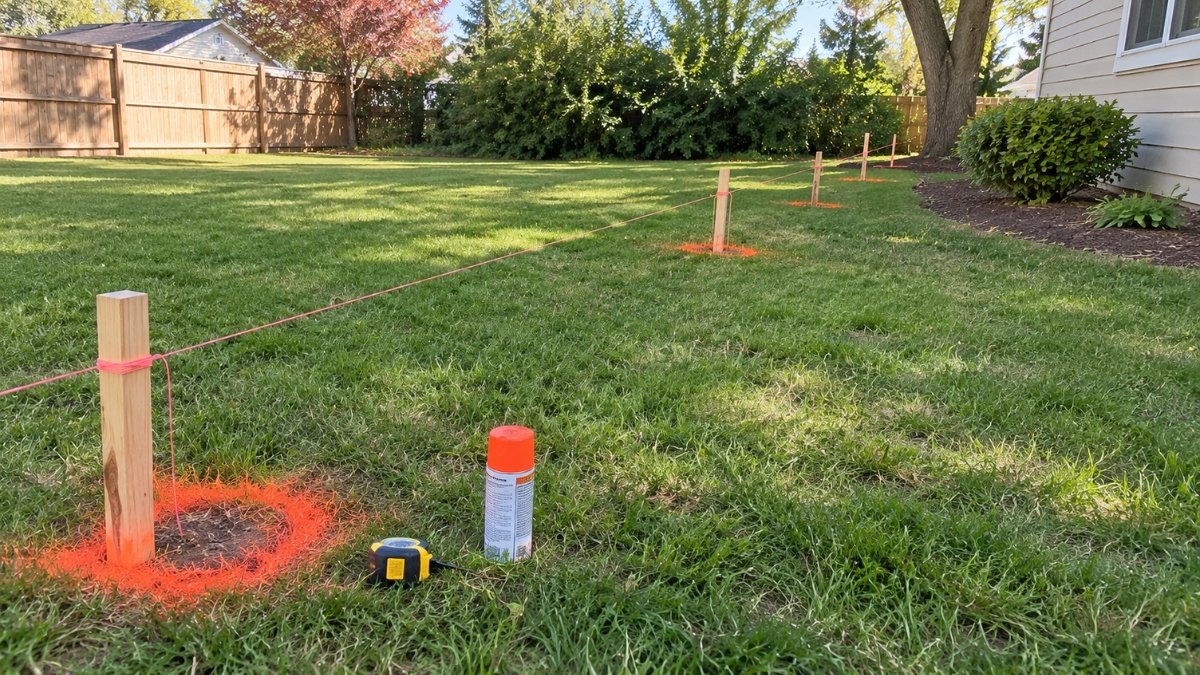
Terminal posts — corners, ends, and gate posts — carry the full tension load of the stretched fabric and must be placed first. Mark these locations clearly before marking line posts, then space line posts evenly between terminal points, typically no more than 10 feet apart.
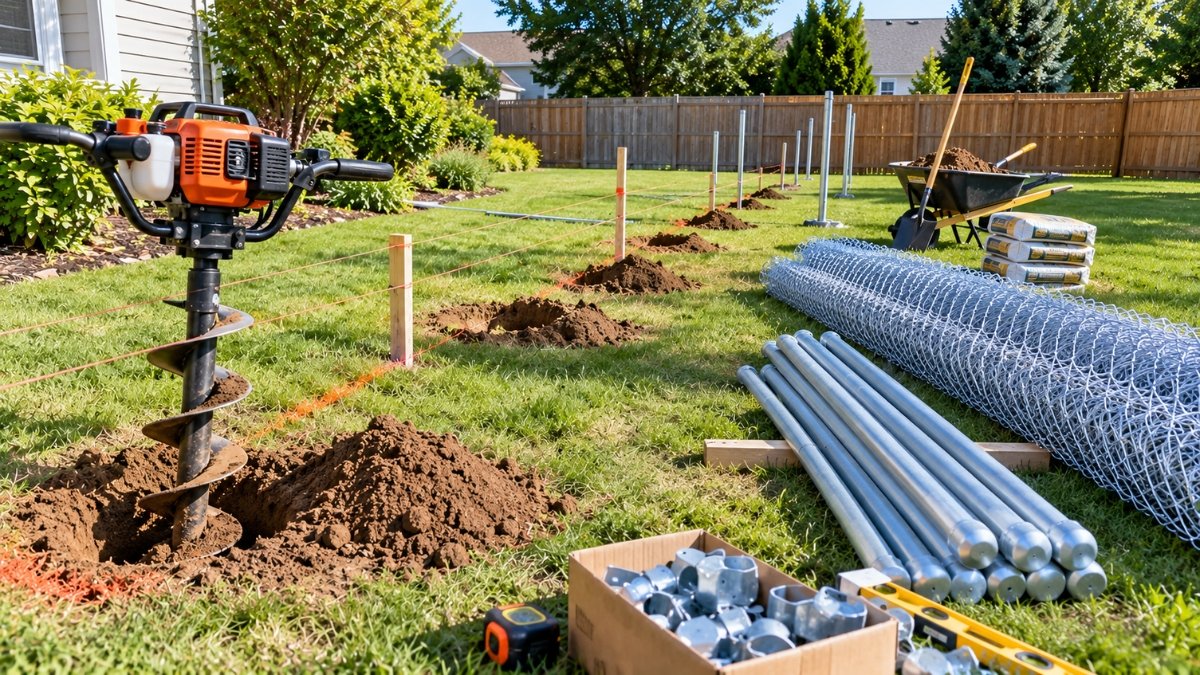
Terminal posts bear significantly more load than line posts, since they anchor the stretched fabric's tension — this difference should be reflected in hole size and depth.
Post Hole Specifications
| Post Type | Hole Diameter | Hole Depth | Notes |
|---|---|---|---|
| Line posts | 8–10 inches | Below frost line, ~24 inches minimum | Minimum 1/3 of post length in ground |
| Terminal posts (corner/end) | 10–12 inches | Same as line posts | Carries tension load — larger hole recommended |
| Gate posts | 12 inches | Same + extra 6 inches | Gate weight and swing load demand deeper footing |
- Dig below the frost line — frost line depth varies by region, from near-surface in the South to 36–48 inches in northern states. Contact your local building department for your area's exact depth.
- Keep hole walls clean and straight — ragged walls with loose soil reduce concrete contact. Use a tube form (Sonotube) in loose or sandy soil if holes collapse.
- Confirm spacing matches your layout plan — double-check each hole location against your Step 1 markings before digging, since line post spacing (up to 10 ft) has more flexibility than panel-based fencing but still needs to stay consistent.
Setting posts plumb and at a consistent height now determines whether the finished fence looks straight and professional. Once concrete sets, corrections mean breaking it out and starting over.
- Set terminal posts first — corners, ends, and gate posts establish the anchor points of the fence. Get these perfectly plumb before moving to line posts.
- Set each post to a consistent height — use your Step 1 mason's line as the height reference so the top rail will run level along the entire fence.
- Pour fast-set concrete — place the post, pour dry fast-setting concrete mix around it, then saturate with water. Mound concrete slightly above grade, sloped away from the post to shed water.
- Check plumb on two adjacent faces — verify both faces read plumb simultaneously, then brace with diagonal 2x4s staked into the ground while concrete sets. Re-check plumb about 5 minutes after pouring.
- Set line posts last — with terminal posts in place and braced, set line posts at even spacing between them along the mason's line.
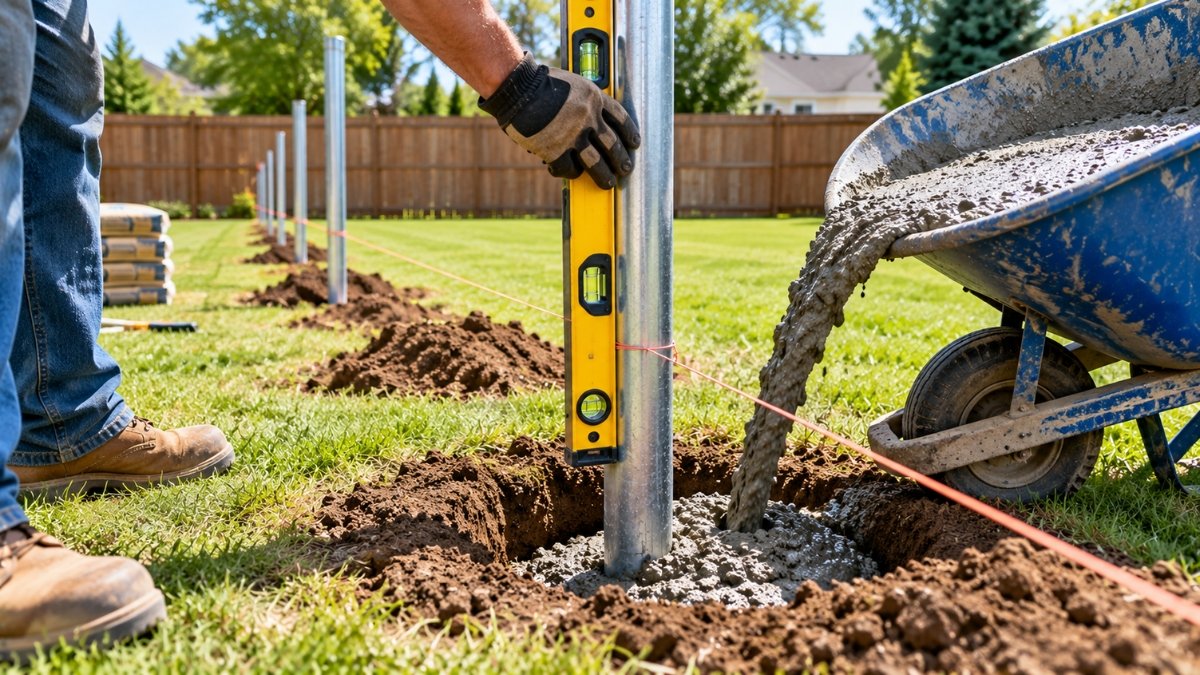
Because terminal posts will carry the full tension load of the stretched fabric later, they deserve extra care getting plumb and extra bracing time before you move on. A terminal post that leans even slightly will visibly pull once the fabric is tensioned against it.
This is the step most tempting to rush — and the one that matters most for how well the posts hold up against fabric tension and wind load for years to come.
- Follow the concrete's cure timeline — fast-setting concrete reaches workable strength in about 4 hours under normal conditions (60–80°F), with full cure at 24–48 hours. Cold weather roughly doubles these times.
- Keep braces in place until the top rail is installed — don't remove bracing just because concrete feels set; leave it until the top rail and fittings give the fence line its own structural rigidity.
- Use the wait productively — sort and stage fabric, rail sections, and fittings near their installation positions so the next steps move quickly once you're ready.
- Re-check post alignment after full cure — concrete shrinks slightly as it cures, which can shift posts minutely. Address any movement now, before fabric installation.
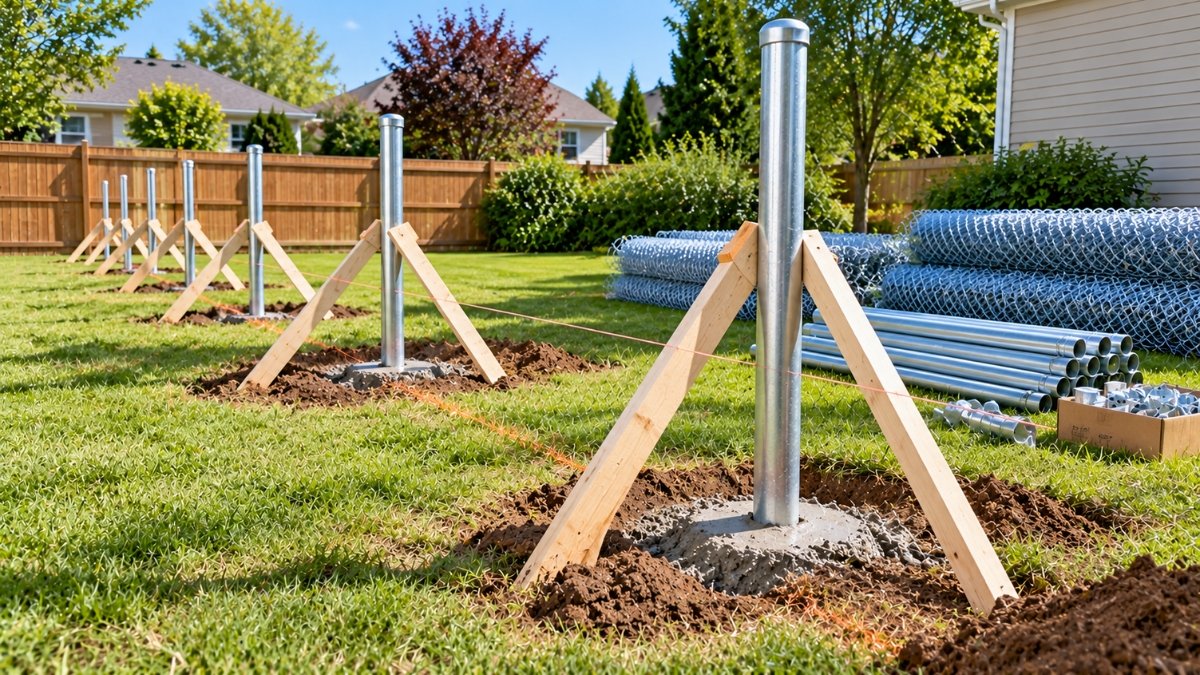
The top rail stiffens the entire fence line and gives the fabric something to be tied to along its top edge. Installing it correctly now makes fabric stretching far easier in the next step.
- Attach rail end fittings to terminal posts — rail ends on corner and end posts, with brace bands securing them to the post itself.
- Run top rail sections through line post caps — most line post caps have a loop that the rail slides through, connecting sections with couplers as you go.
- Attach tension bands to terminal posts — space tension bands evenly along the height of each terminal post; these will later hold the tension bar that anchors the stretched fabric.
- Install post caps on all terminal posts — these cap the post top and give the top rail its connection point at corners and ends.
- Check the rail runs level and square to the posts — a level, properly connected top rail makes the fabric stretch evenly in the next step.
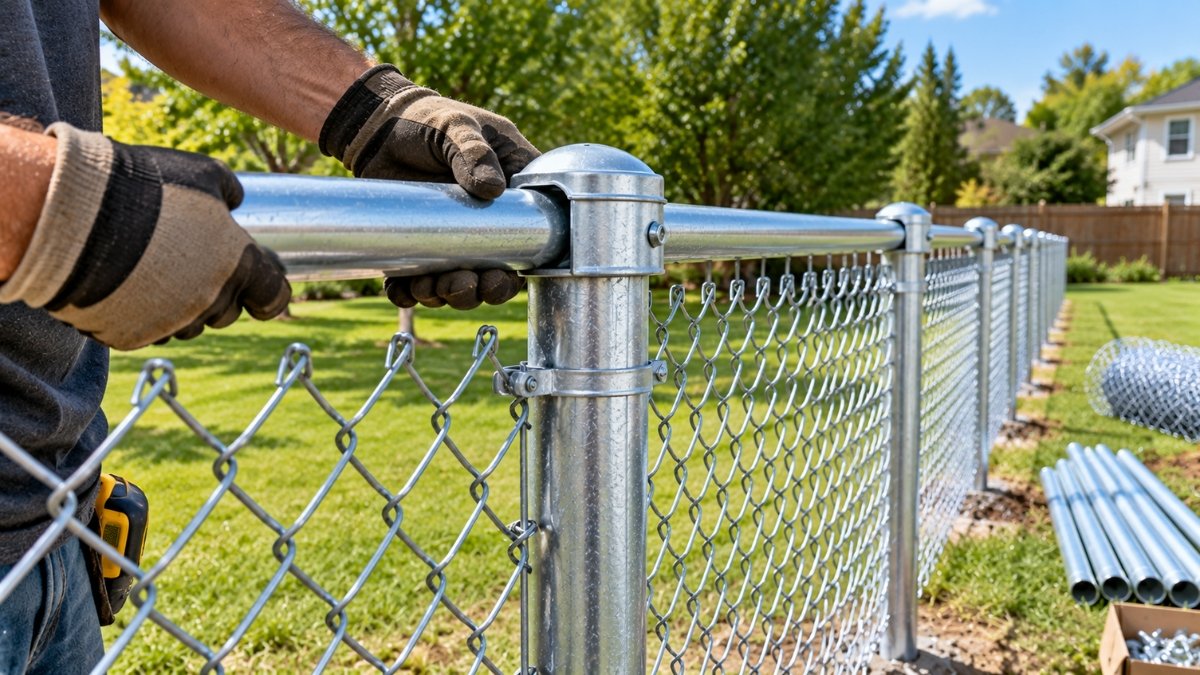
This is the step that defines chain link installation and the one most likely to go wrong without the right tool and technique. Take your time and don't skip the stretching step to save effort.
- Unroll the fabric along the fence line — stand the roll up at the starting terminal post and unroll it along the ground, letting it lean against the posts and top rail as you go.
- Attach the starting end to the first terminal post — thread a tension bar through the fabric's end diamonds and secure it to the terminal post's tension bands.
- Pull the fabric toward the next terminal post by hand — walk the fabric along the fence line, lifting it onto the top rail as you go, leaving it loose for now.
- Attach the stretcher to the free end — thread a second tension bar through the fabric a few feet from the end and attach your come-along or fence stretcher between that bar and the terminal post.
- Stretch gradually, checking tension as you go — tighten in stages rather than all at once, checking that the fabric diamonds are roughly uniform in shape (not stretched into ovals) across the full height.
- Secure the stretched end once properly tensioned — once tension looks right, attach the fabric's tension bar to that terminal post's tension bands, then release the stretcher.
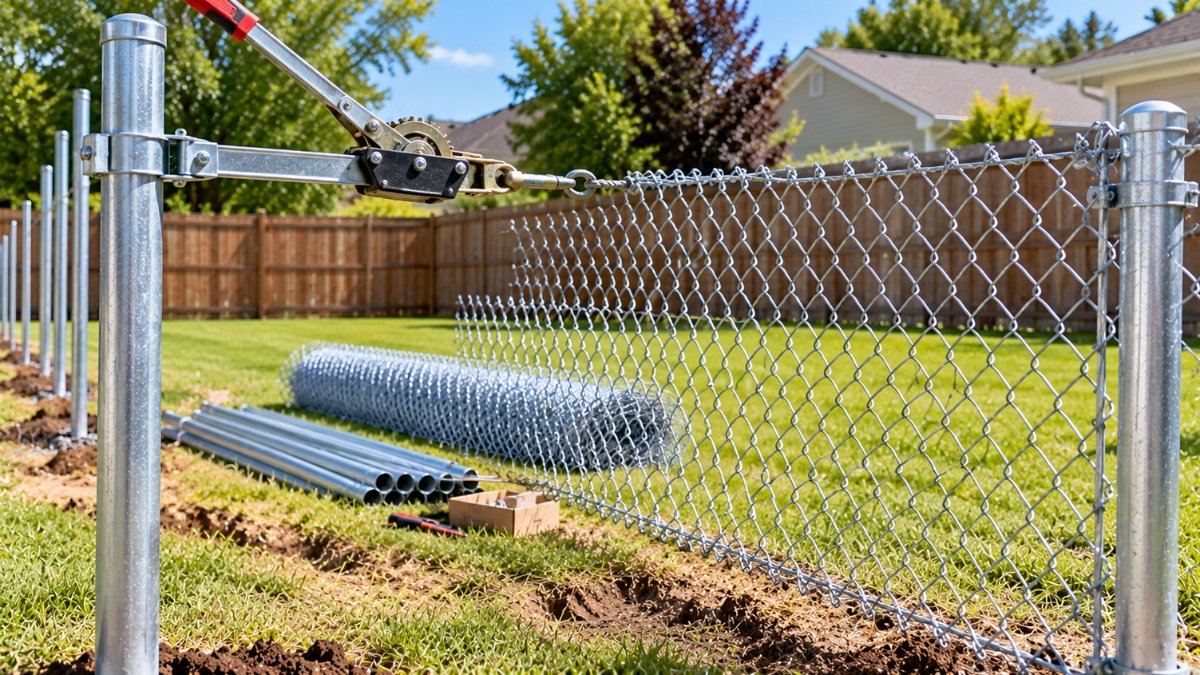
Under-stretched fabric sags and looks wavy; over-stretched fabric distorts the diamond pattern into narrow ovals and puts excess strain on the terminal posts. The right amount of tension produces fabric that looks taut with diamonds that are roughly uniform and square-ish across the entire height — check this visually before committing to the final tension.
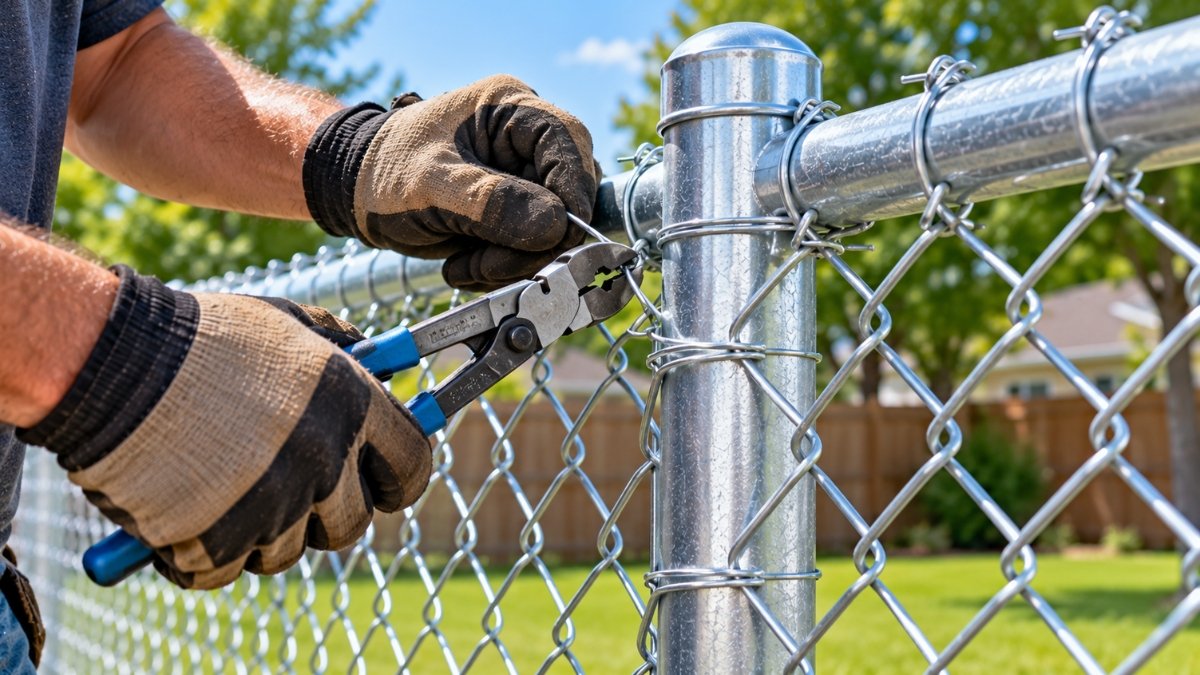
With the fabric properly stretched and secured at both ends, this step locks it to every post and the top rail along the full run, so the tension holds evenly over time rather than relying only on the terminal post connections.
- Tie the fabric to the top rail — using tie wires, secure the fabric to the top rail every 12–24 inches along the entire fence run.
- Tie the fabric to each line post — attach with tie wires at roughly 12–15 inch intervals up the height of each line post.
- Install the bottom tension wire, if using — run tension wire along the bottom of the fabric, tying it off at terminal posts and threading it through or tying it to the fabric's bottom edge every few feet. This is especially worthwhile for pet containment, keeping the bottom edge from being pushed up.
- Trim excess fabric cleanly — use bolt cutters to trim any excess fabric at terminal posts, cutting along a full diamond line rather than mid-diamond for a clean edge.
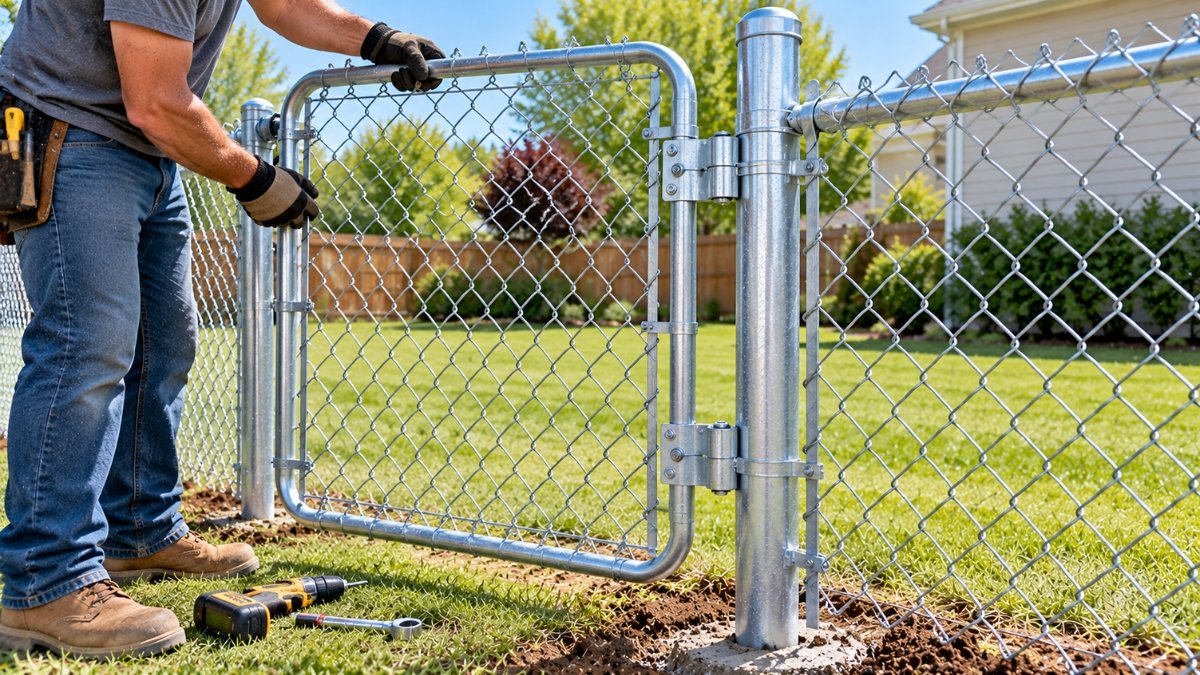
Gate installation is a precise final step — gate posts that aren't perfectly plumb or hinges set at the wrong height will cause binding and sagging that gets worse over time.
- Verify gate post plumb before hanging — re-check both gate posts on all faces. Even slight lean produces real misalignment at the top of the gate and causes binding.
- Attach hinges to the gate post — position hinges at the manufacturer-specified height, typically 8–12 inches from the top and bottom of the gate frame.
- Hang the gate frame — with a helper supporting the gate's weight, align the hinge leaves and secure the mounting hardware. Check that the gate swings freely through its full arc.
- Install the latch — position latch hardware at a comfortable height on the latch post side, attaching the latch body to the gate and the strike to the post. Test that it engages positively.
- Add a gate stop if the gate will be left open often — a simple stop anchored to the ground or fence line prevents the gate from swinging too far and stressing the hinges over time.
A thorough walkthrough now catches anything that needs adjustment while tools and materials are still on hand, rather than discovering it weeks later.
- Walk the full fence line checking every post — look for any that shifted during fabric stretching or tying. Address now, since corrections after full use are more difficult.
- Check fabric tension across the whole run — confirm there's no sagging or looseness anywhere along the fence, especially mid-span between terminal posts.
- Inspect every tie wire — tug gently on a sample of ties to confirm they're holding the fabric securely to posts and rail.
- Test the gate thoroughly — swing it through its full arc several times, confirming the latch engages smoothly every time with no binding.
- Check for sharp or protruding wire ends — bend down or trim any fabric ends or tie wire tails that could snag clothing or skin, particularly near the gate and at ground level.
- Backfill around post bases — once concrete is fully cured, backfill with excavated soil, mound slightly at grade, and tamp firmly.
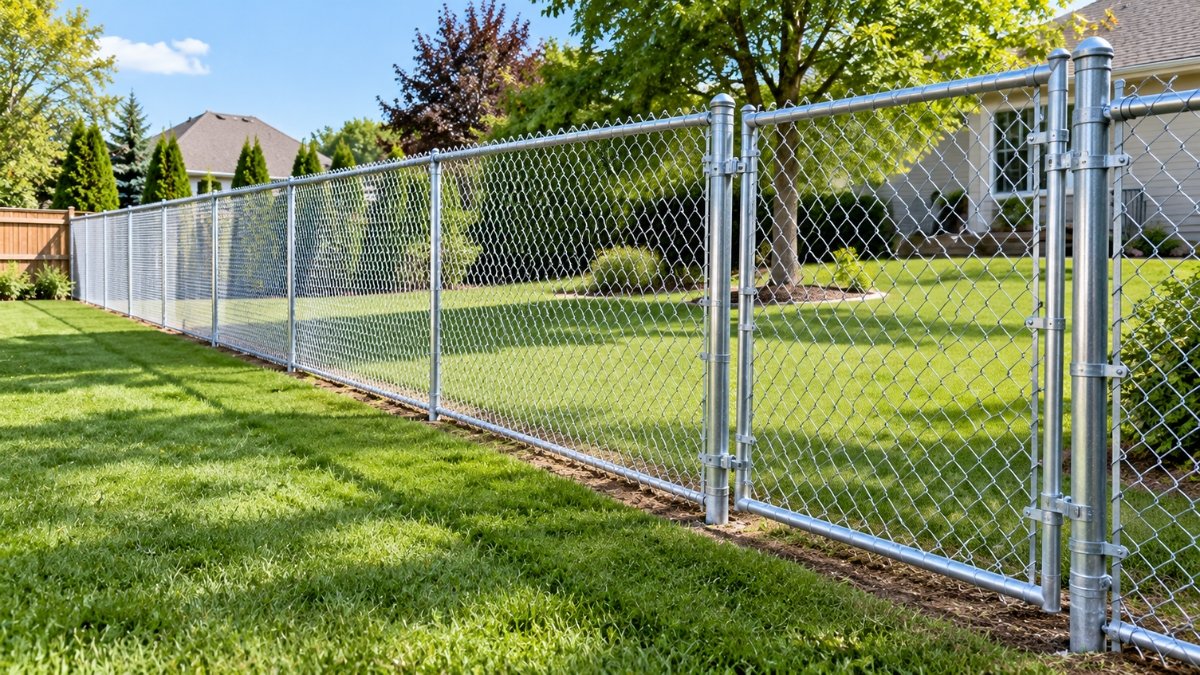
A properly installed, galvanized chain link fence needs very little maintenance for 15–20 years — just periodic checks for rust spots or loose ties. See how your project cost compares with professional installation using our chain link fence cost calculator.
Pro Tips & Common Mistakes
Common Mistakes to Avoid
- Not confirming property lines — a fence built over a property line may need to be relocated at the owner's expense. Confirm with a survey before starting.
- Under-stretching the fabric — fabric that isn't properly tensioned sags visibly within months. Don't skip renting a proper stretcher to save a small amount of money.
- Setting terminal posts without extra bracing — these posts carry the full tension load and need to be rock-solid before fabric goes on; skimping here shows up immediately once you start stretching.
- Spacing line posts too far apart — exceeding roughly 10 feet between line posts allows the fabric and top rail to sag between supports, even if terminal posts are solid.
- Working with dull bolt cutters — dull cutters crush fabric wire ends instead of cleanly cutting them, leaving a ragged, sharp edge that's both unsafe and unattractive.
- Skipping the bottom tension wire for pet containment — without it, fabric at the bottom edge can be pushed up or dug under far more easily.
Pro Tips
- Work the fabric stretch in stages rather than pulling to full tension in one motion — gradual tensioning gives you more control and a more even final result.
- Keep tie wires loosely pre-cut to length before you start tying, so you're not stopping to cut wire every few feet while working.
- Install in moderate weather when possible — extremely cold fabric is stiffer and harder to work with, while very hot galvanized fabric can be uncomfortably warm to handle for extended periods.
- Photograph post hole locations and fence corners before backfilling — useful documentation for future repairs or if boundary questions arise later.
- Order slightly more tie wire and fabric than the bare minimum — both are inexpensive relative to the labor of a return trip for a small shortfall.
Frequently Asked Questions

Prakash
Prakash is the founder and editor of ConstructlyTools. He researches, develops, and maintains construction calculators, material estimators, cost guides, and DIY planning resources designed to help homeowners, contractors, and builders make informed project decisions.
Every calculator and guide is researched using trusted industry references, published building standards, manufacturer specifications, and reliable construction pricing sources. Each page is reviewed for formula accuracy, pricing methodology, readability, and practical usefulness before publication and is updated regularly as standards or market prices change.
Every calculator and article published on ConstructlyTools is independently reviewed for formula accuracy, pricing methodology, readability, and practical usefulness before publication. Content is updated whenever construction pricing, industry standards, or building code references significantly change.
This page was researched, written, and reviewed in accordance with our Editorial Policy.