Use this free attic insulation calculator to find how many bags of blown-in cellulose or fiberglass you need, and how deep to install it. Pick your climate zone, enter your attic area and what you already have, and it works out the R-value to add, the bags, the depth and the weight. For walls, floors or crawl spaces, use the Insulation Calculator. Quick answer: ENERGY STAR’s retrofit goal for an uninsulated attic is about R-30 in Zone 1, R-49 in Zones 2–3 and R-60 in Zones 4–8, which is roughly 15 inches of blown cellulose for R-49 and 18 inches for R-60.
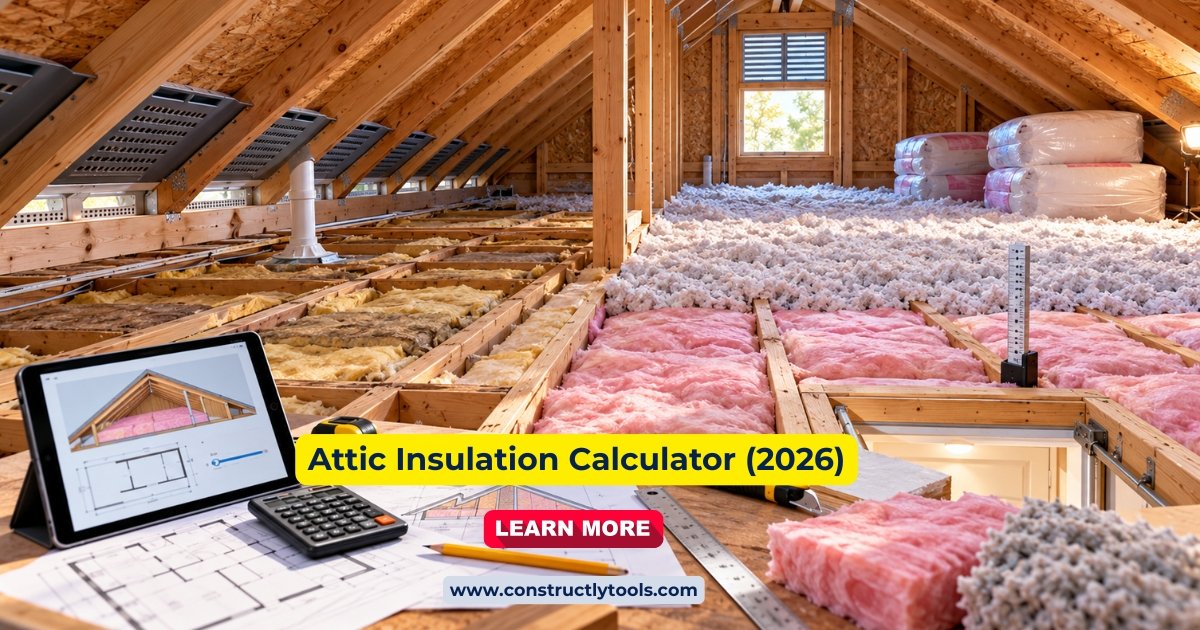
Illustration created with AI for this page. It is not a photo of a real attic.
Reviewed by
Prakash·Published: October 13, 2026·Sources: ENERGY STAR · manufacturer coverage charts · EPA
R to add = Goal R − Existing R Bags = (Net Area ÷ 1,000) × Bags per 1,000 sq ft at that R-value, rounded up Existing R ≈ Depth × R per inch (cellulose 3.4, fiberglass 2.5)
Bags of Insulation to Buy
—
Enter your attic area above
Goal (Total R)
—
Existing R (est.)
—
R-Value to Add
—
Net Area
—
Min. Depth to Install
—
Settled Depth
—
Min. Weight to Install
—
Est. Material Cost
—
Bag counts are estimates from published manufacturer coverage charts — always follow the coverage chart printed on the bags you buy. Both the minimum bag count and the minimum depth must be met to reach the stated R-value.
Estimates only. Check local building code and your product label before ordering.
Recommended Attic Insulation R-Value by Climate Zone
ENERGY STAR recommends the levels below for retrofitting existing wood-framed homes, based on the 2021 International Energy Conservation Code (IECC). The goal for an uninsulated attic is a total of R-30 in Zone 1, R-49 in Zones 2–3 and R-60 in Zones 4–8. The calculator above uses these totals and subtracts what you already have.
Climate Zone
Goal (Total R)
Listed if 3–4 in. Already There
Cellulose Depth at Goal
Fiberglass Depth at Goal
Zone 1
R-30
R-25
9.6 in
12.4 in
Zones 2–3
R-49
R-38
15.2 in
19.1 in
Zones 4–8
R-60
R-49
18.4 in
22.6 in
The third column is the level ENERGY STAR lists for attics that already have about 3–4 inches of insulation (roughly R-11). Added to what is already there, it brings the attic to about the same total goal. Depths are the minimum installed thickness from the GreenFiber (cellulose) and Johns Manville (fiberglass) charts below; blown-in insulation settles over time.
How to Find Your Climate Zone
Climate zones are assigned by county, so a state can contain several. Use the zone map on the ENERGY STAR recommended levels page or ask your county building department. A few well-known cities for reference:
Typical City
Climate Zone
Goal (Total R)
Miami, FL
1A
R-30
Houston, TX · Phoenix, AZ
2A · 2B
R-49
Atlanta, GA · Dallas, TX
3A
R-49
Nashville, TN
4A
R-60
Seattle, WA
4C
R-60
Chicago, IL · Denver, CO
5A · 5B
R-60
Minneapolis, MN
6A
R-60
Duluth, MN
7
R-60
Your local code may require more or less than these retrofit recommendations. When in doubt, follow your local code.
How Many Bags and How Deep? Coverage by R-Value
These figures are taken from two manufacturers’ published attic coverage charts. Different brands and bag sizes differ, so treat them as a planning guide and use the chart on your own bag for the final order. The calculator interpolates between the published R-values.
Manufacturers publish both numbers because the R-value depends on how much material is in the attic, not just how tall the pile looks. If you fluff it too thin you can reach the depth with fewer bags and fall short of the R-value. Meet both the bag count and the depth.
Understanding the Calculator Inputs
Attic Floor Area
The area of the attic floor you will insulate, in square feet. For a simple attic above the whole house, the area is close to the footprint of the top floor. Measure the attic itself, length × width of each section, or use the floor area from your plans. The area above an attached garage or a porch counts only if you are insulating it.
Area Not Insulated
Subtract any area that will not receive loose-fill insulation, such as the attic hatch, a chimney chase, a platform you want to keep clear or a section with a different plan. Leave it blank if you are insulating everything.
Climate Zone and Goal R-Value
Pick your IECC climate zone to load ENERGY STAR’s goal for an uninsulated attic, or choose “Custom” to type your own total R-value (for example, a higher goal for a very cold climate or a lower one if your local code says so).
Insulation Already in the Attic
For blown-in insulation, measure the depth in several places and average it. The calculator multiplies depth by about 3.4 R per inch for cellulose and 2.5 R per inch for fiberglass, based on the settled-depth figures in the charts above. If you have batts, rolls or another material, choose “Other” and enter the R-value from the label or your best estimate. Compressed, wet, dusty or uneven insulation performs below its rated value, so treat the result as an estimate.
Insulation to Add
Blown-in cellulose and fiberglass get bag counts, depth and weight from the charts. For batts or rolls, the calculator gives the area to buy with 5% extra for cuts; read the package for the coverage per bundle, and choose a product whose R-value matches the R-value you need to add.
Worked Examples
Example 1 — Uninsulated 1,200 sq ft Attic in Chicago (Zone 5)
Goal for Zone 5 is R-60. The attic is bare, so R to add = 60 − 0 = 60.
Cellulose chart at R-60: 108.1 bags per 1,000 sq ft.
Add about 15.7 inches on top of what is already there.
Example 3 — Topping Up 6 Inches of Cellulose in Nashville (Zone 4)
900 sq ft attic with 20 sq ft taken up by the hatch and a chimney chase, so net area = 880 sq ft. Goal R-60; existing 6 in × 3.4 = R-20.4, so R to add = 39.6.
Cellulose chart: R-38 = 61.1 and R-49 = 83.5 bags per 1,000 sq ft, so R-39.6 ≈ 64.4 bags per 1,000 sq ft.
Bags needed:
880 ÷ 1,000 × 64.4 = 56.6 → 57 bags of cellulose
For a price, multiply the bag count by the price on your bag, or use our Insulation Cost Calculator to compare DIY and professional installation.
Before You Add Insulation: Safety and Prep Checklist
Air seal first. Seal gaps around wiring, plumbing, ducts, flues and the tops of walls. ENERGY STAR lists attic air sealing ahead of attic insulation because warm air leaking into the attic can undo much of the benefit.
Keep the soffit vents open. Install rafter baffles (vent chutes) at the eaves so insulation does not block air flowing into the attic.
Mind heat sources. Only cover recessed lights that are rated for insulation contact (IC-rated). Keep insulation clear of flues, chimneys and non-IC fixtures by the distance in the manufacturer’s instructions and your local code.
Fix leaks and moisture first. Wet or moldy insulation should be removed, not buried. Repair roof leaks and vent bath fans to the outdoors, not into the attic. See our Mold Remediation Cost Calculator if you find mold.
Check old wiring. If you see cloth-covered or knob-and-tube wiring, have an electrician advise before covering it; many local codes limit insulating over it.
Check for vermiculite. Pebble-like, gray-brown loose-fill insulation may be vermiculite. EPA advises assuming it contains asbestos, not disturbing it and not removing it yourself. Stop and call a trained professional.
Protect yourself. Wear a respirator or N95 mask, goggles, gloves and long sleeves, step only on joists or boards, and avoid working in a hot attic in summer.
⚠️ Safety
An attic can hide electrical, structural and moisture problems. This page is general guidance, not a code review. If anything looks wrong, stop and consult a licensed professional.
DIY or Hire a Pro?
Blowing loose-fill insulation over an accessible, dry, well-sealed attic is a common DIY job, and many home centers lend a blower with a minimum purchase of bags (ask your store). It takes two people: one feeds the machine and one works in the attic. Hire a professional when:
You find vermiculite, mold or old wiring you are not sure about.
The attic has little headroom, no safe walkway or complex framing.
You need extensive air sealing, new baffles or duct repairs.
Your local program requires a licensed installer for rebates or incentives.
Ordering by depth alone. Meet the bag count and the depth. Fluffing material to reach a height can leave you short on R-value.
Ignoring settling. Blown-in insulation settles. The cellulose chart above shows about 10% less depth after settling, so install to the minimum installed depth, not the settled one.
Blocking soffit vents. Without baffles the insulation can choke the airflow that keeps the roof dry.
Skipping air sealing. Insulation slows heat flow; it does not stop air leaks.
Covering non-IC recessed lights or flues. This is a fire risk. Follow the manufacturer and your code.
Insulating over a problem. Wet, moldy or vermiculite insulation must be dealt with first.
Forgetting the hatch. An uninsulated attic hatch leaks heat. Insulate and weatherstrip it too.
Rounding down. Round bags up; a half bag is rarely sold.
How We Calculate
Step 1 — Goal R-value. The goal is the total for an uninsulated attic from ENERGY STAR’s retrofit table (based on the 2021 IECC): Zone 1 = R-30, Zones 2–3 = R-49, Zones 4–8 = R-60, or your own custom value.
Step 2 — Existing R-value. Existing R = depth × R per inch (cellulose 3.4, blown fiberglass 2.5), or the value you enter. These per-inch values are our estimates derived from the settled-depth figures in the two charts (cellulose about 3.4–3.6 R per inch, fiberglass about 2.4–2.6), and used conservatively.
Step 3 — R-value to add. R to add = Goal − Existing, never below zero.
Step 4 — Bags, depth and weight. We interpolate linearly between the published rows of the chart for the material you choose, to find bags per 1,000 sq ft, minimum installed depth, settled depth and minimum weight at the R-value to add. If you need less R than the chart’s lowest row (R-13 for cellulose, R-11 for fiberglass), the lowest row is used. Bags = (Net Area ÷ 1,000) × Bags per 1,000 sq ft, rounded up. Net Area = Attic Area − Area Not Insulated.
Batts and rolls. Area to buy = Net Area × 1.05 (5% for cuts and waste).
Cost. Cost = bags × the bag price you enter. No prices are assumed.
ℹ️ How This Page Was Made
We use AI tools to help draft and format some content. The figures on this page come from the published sources listed below, and the formulas and examples were checked before publication. See our editorial policy.
Sources and References
The figures on this page were checked against the sources below in October 2026.
ConstructlyTools has no paid relationship with any manufacturer named here; the products are cited only because their published charts were used. Coverage varies by brand, so follow the chart on your bag.
Frequently Asked Questions
How much insulation should I have in my attic?+
ENERGY STAR recommends a total of about R-30 in Climate Zone 1, R-49 in Zones 2–3 and R-60 in Zones 4–8 for an uninsulated attic, based on the 2021 IECC. In inches, R-49 is about 15 inches of blown cellulose or 19 inches of blown fiberglass, and R-60 is about 18 inches of cellulose or 22.6 inches of fiberglass (manufacturer charts above). Your local building code may differ, so check it before you buy.
How many bags of blown-in insulation do I need per 1,000 square feet?+
It depends on the product and the R-value. For the GreenFiber cellulose chart above, R-30 takes at least 46.1 bags per 1,000 sq ft, R-49 takes 83.5 and R-60 takes 108.1. For the Johns Manville fiberglass chart, R-30 takes 14.9 bags per 1,000 sq ft, R-49 takes 25.9 and R-60 takes 32.6. Fiberglass bags cover more area but need more depth. Always use the chart on your own bags and round up.
How thick should attic insulation be?+
It depends on the material, because each has a different R-value per inch. By the charts above, you need at least 15.2 inches of cellulose or 19.1 inches of fiberglass for R-49, and 18.4 inches of cellulose or 22.6 inches of fiberglass for R-60. Cellulose settles by about 10%, so install to the minimum installed depth printed on the bag. Depth alone is not enough: you must also use the minimum number of bags.
Can I add new insulation on top of old insulation?+
Often yes, if the existing insulation is dry, clean, free of mold and is not vermiculite. Unfaced loose-fill or unfaced batts are usually the choice for topping up; avoid adding a second layer of faced batts, which can trap moisture, and follow the manufacturer’s instructions. Enter the existing depth or R-value in the calculator and it subtracts it from your goal. If you suspect vermiculite, do not disturb it; see the checklist above.
Is blown-in cellulose or fiberglass better for an attic?+
Both can reach the same R-value. In the manufacturer charts above, cellulose reaches a given R-value with a thinner layer (R-49 at about 15 inches versus about 19 inches for fiberglass) but takes more bags and is heavier. Fiberglass is lighter and does not settle as much in the charts, but needs more depth. The best choice depends on price in your area, attic depth available and installer or equipment availability. Choose the one whose chart you can follow and meet.
How much does it cost to insulate an attic?+
It varies widely by region, material, attic size, access and whether you hire an installer. We do not assume a price here: type the price of a bag into the calculator to see the material cost, or use our Insulation Cost Calculator to compare DIY and professional costs. Air sealing, baffles and equipment rental add to the total.
Will more attic insulation lower my heating bill?+
ENERGY STAR says sealing air leaks and adding insulation can save up to 10% on annual energy bills. Results depend on your climate, your current insulation, how leaky the home is, and your heating system. Savings are usually largest when you start from little or no insulation and also air seal.
Can I store things in an insulated attic or walk on the insulation?+
Avoid walking on loose-fill insulation or packing boxes on it, because compressing it lowers its effective R-value and you could step through the ceiling between joists. If you need storage, build a raised platform on the joists, and insulate to the full depth beneath or around it.
Related Calculators & Tools
Plan your winter home-efficiency projects with these free tools.
Prakash is the founder and editor of ConstructlyTools. He researches, develops, and maintains construction calculators, material estimators, cost guides, and DIY planning resources designed to help homeowners, contractors, and builders make informed project decisions.
Every calculator and guide is researched using trusted industry references, published building standards, manufacturer specifications, and reliable construction pricing sources. Each page is reviewed for formula accuracy, pricing methodology, readability, and practical usefulness before publication and is updated regularly as standards or market prices change.
Formula Accuracy Verified
2026 Pricing Reviewed
Industry Sources Referenced
Updated Regularly
Last reviewed: October 13, 2026
Professional Highlights
Founder of ConstructlyTools
Develops Construction Calculators
Researches Cost Estimation Data
Reviews Building Code References
Updates Pricing Annually
Focused on DIY Homeowners & Professionals
Editorial Review Process
Every calculator and article published on ConstructlyTools is reviewed by the editor for formula accuracy, pricing methodology, readability, and practical usefulness before publication. We use AI tools to help draft and format some content; every figure and formula is checked by the editor before publication. Content is updated whenever construction pricing, industry standards, or building code references significantly change.