- Overview & Cost Savings
- Best Time to Install Sod
- Tools & Materials
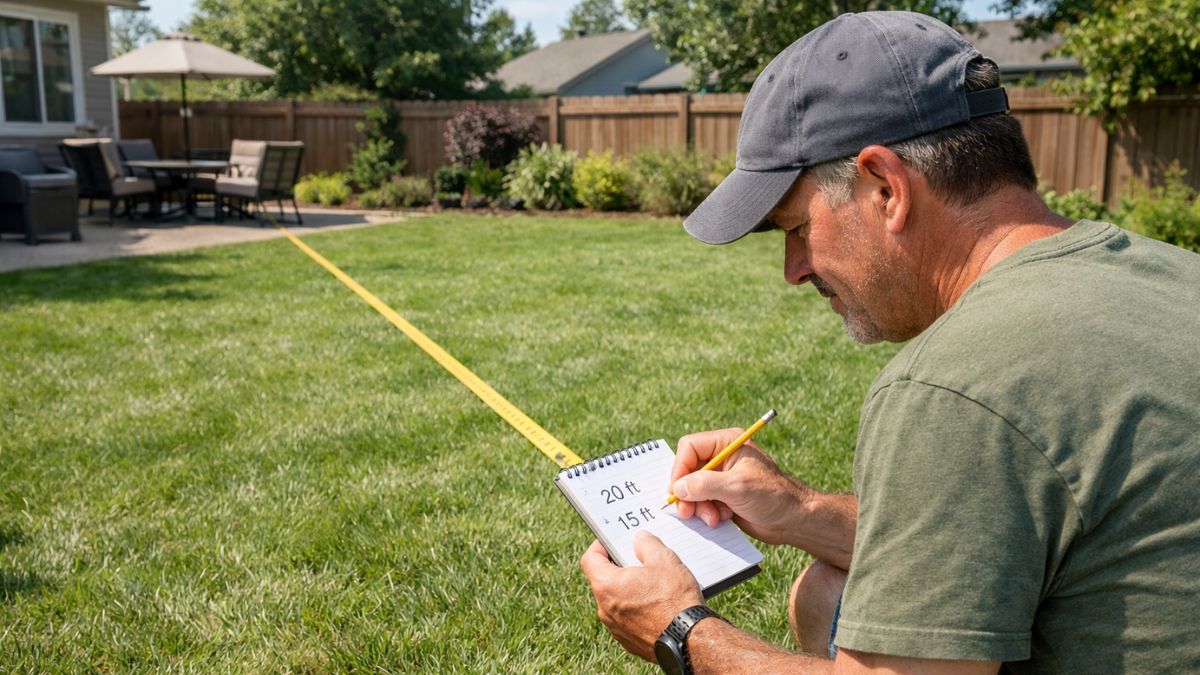
- Step 1 — Measure & Order Sod
- Step 2 — Kill & Remove Existing Grass
- Step 3 — Test & Prepare the Soil
- Step 4 — Grade & Level the Area
- Step 5 — Add Starter Fertilizer
- Step 6 — Lay the Sod
- Step 7 — Roll the Sod
- Step 8 — Water & Establish
- Material Cost Breakdown (2026)
- FAQs
How to Install Sod — Overview
Installing sod gives you an instant lawn — no waiting 6–8 weeks for grass seed to germinate, no bare patches, and no erosion risk. A healthy sod lawn is fully established and walk-ready in 3–4 weeks. Professional sod installation costs $0.75–$1.70 per square foot installed — roughly $1,500–$3,400 for a typical 2,000 sq ft lawn. By doing it yourself, you pay only for sod and materials, typically $0.30–$0.80 per square foot — saving $500–$2,000 on a standard project.
The key to successful sod installation is in the soil preparation. Get that right and sod is nearly foolproof. Rush it and even expensive sod will fail.
Best Time to Install Sod by Grass Type
Timing is critical for sod success. Installing sod when your grass type is actively growing gives roots the best chance to establish quickly. See our Sod Calculator for pricing on all 6 grass types.
| Grass Type | Best Install Time | Climate | Avoid |
|---|---|---|---|
| Tall Fescue | Sept – Oct (early fall) | North, Midwest | Summer heat |
| Kentucky Bluegrass | Sept – Oct (early fall) | North, Northeast | Summer heat |
| Bermuda | May – June (late spring) | South, Southwest | Below 60°F |
| Zoysia | May – July | South, Transition | Fall, winter |
| St. Augustine | April – June | Gulf Coast, FL | Below 60°F |
| Centipede | May – July | Southeast | Early spring, fall |
Tools & Materials You'll Need
🔧 Tools
- Tape measure
- Lawn mower or sod cutter (rental ~$80/day)
- Rototiller (rental ~$60–$100/day)
- Lawn roller (rental ~$30–$50/day)
- Rake & landscaping rake
- Garden hose or sprinkler system
- Sharp knife or sod cutter
- Wheelbarrow
- Work gloves
- Soil pH test kit (~$15)
🌿 Materials
- Sod (pallets — order 5% extra)
- Starter fertilizer (phosphorus-rich)
- Topsoil (if needed for low spots)
- Compost or soil amendment
- Lime or sulfur (if pH needs adjusting)
- Biodegradable sod staples (for slopes)
- Lawn edging (optional)
Accurate measurement is the most important pre-installation step. Order too little and you run short mid-installation — a serious problem since sod must be installed within 24 hours of delivery.
- Measure your lawn area in feet and calculate square footage — use our Square Footage Calculator for instant results.
- For irregular shaped lawns, divide into rectangles, calculate each section, and add them together.
- Add 5% extra for cuts and irregular edges — our Sod Calculator does this automatically.
- A standard pallet covers 450 sq ft — divide your total by 450 and round up to get pallet count.
- Order from a local sod farm when possible — fresher sod, better prices, and you can inspect quality before delivery. Sod from a farm is typically 20–30% cheaper than from a landscaping supply yard.
- Schedule delivery for the morning of your installation day — sod must be installed the same day it arrives.
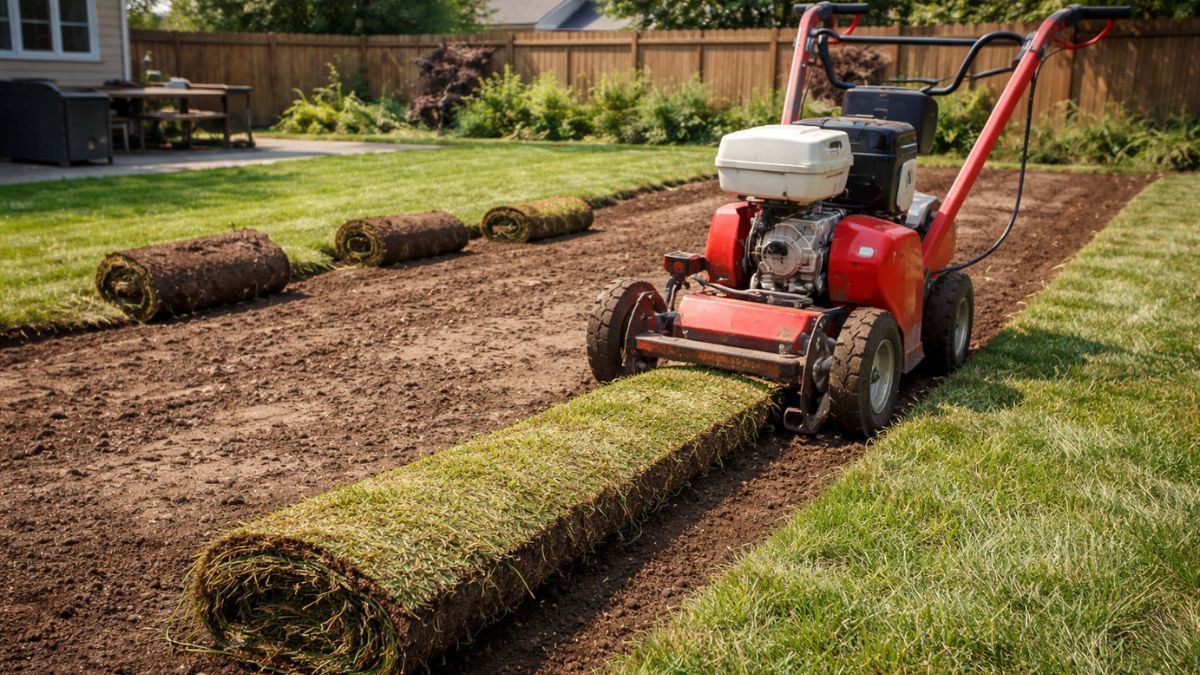
New sod needs direct soil contact to root. Laying sod over existing grass or weeds prevents rooting and leads to failure. Remove all existing vegetation before starting.
- Option A — Sod cutter (recommended): Rent a sod cutter ($80/day) to remove the top 1–2 inches of existing turf. Fast, clean, and no chemicals needed.
- Option B — Non-selective herbicide: Apply glyphosate-based herbicide 2 weeks before installation. Wait until all vegetation is completely dead and brown before tilling. Follow all EPA label instructions carefully.
- Option C — Smothering: Cover with black plastic sheeting for 4–6 weeks to kill grass through heat. Slowest method but no chemicals.
- After removing existing grass, till the area to 4–6 inches depth with a rototiller to break up compacted soil.
- Remove all rocks, roots, and debris larger than 1 inch from the tilled area.
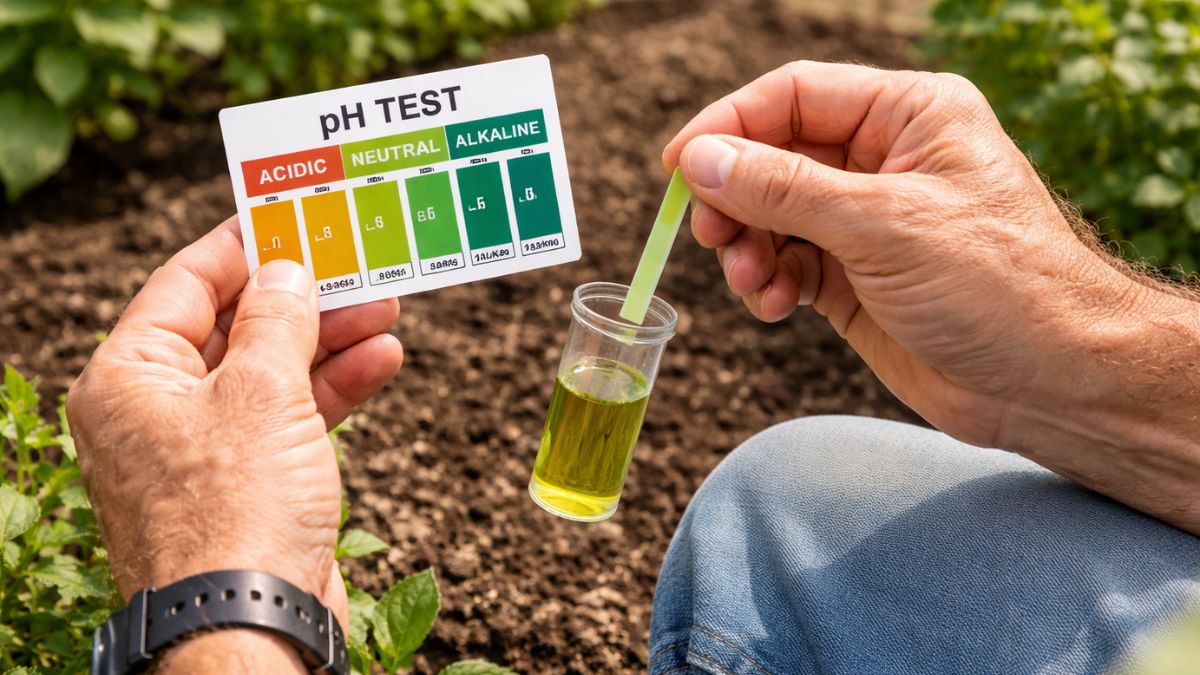
Healthy soil is the foundation of a healthy lawn. A $15–$30 soil test tells you exactly what your soil needs — pH, nitrogen, phosphorus, and potassium levels. This is one of the most overlooked steps in sod installation and one of the most impactful.
- Most grasses prefer a soil pH of 6.0–7.0. Outside this range, nutrients become unavailable to grass roots even if they're present in the soil.
- If pH is too low (acidic) — add lime to raise it. Apply per test recommendations, typically 40–60 lbs per 1,000 sq ft.
- If pH is too high (alkaline) — add sulfur to lower it. Apply per test recommendations.
- Add 2–3 inches of quality compost to the top of your tilled soil and work it in. This improves drainage in clay soils and water retention in sandy soils.
- If soil quality is very poor, add 2–4 inches of quality topsoil. Use our Topsoil Calculator to estimate how much you need.
- You can get a free or low-cost soil test through your local USDA Extension office.
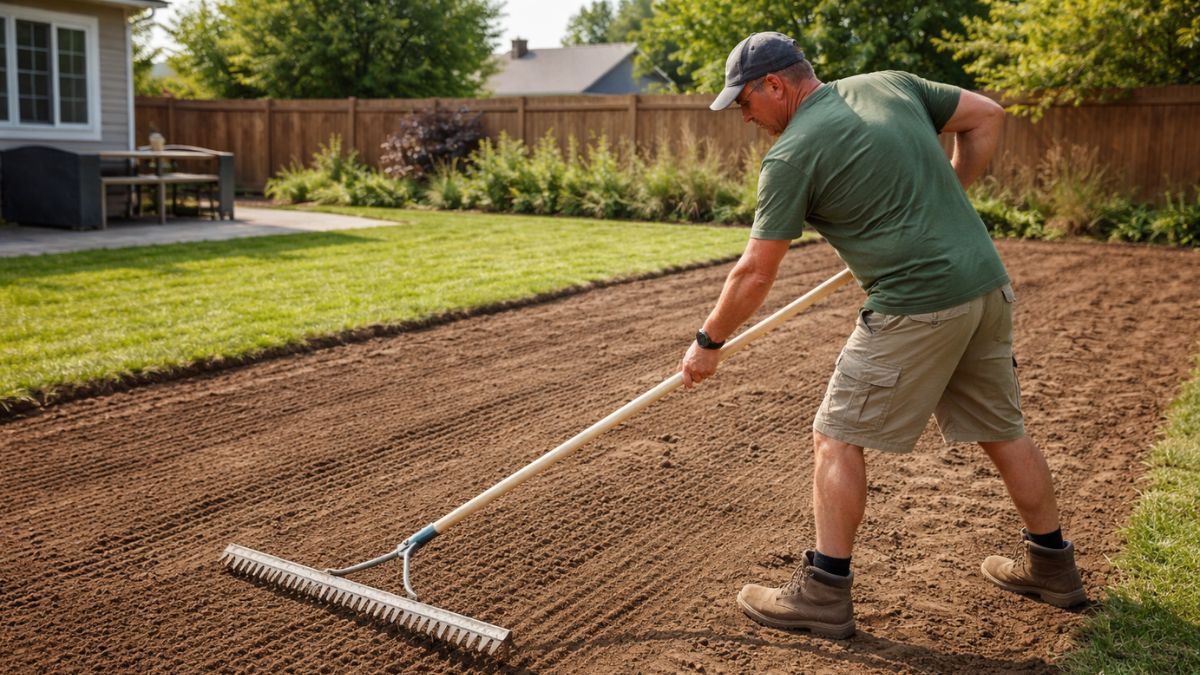
A smooth, properly graded surface ensures your finished lawn looks professional and drains correctly. Uneven ground under sod causes bumps that are almost impossible to fix after installation.
- Rake the tilled soil until the surface is smooth and firm with no high or low spots larger than ½ inch.
- Grade the surface so it slopes away from your house at a minimum ½ inch per foot for at least 6 feet. This directs water away from your foundation.
- Fill any low spots with topsoil and compact lightly. Use our Topsoil Calculator for fill estimates.
- The final surface should sit ¾–1 inch below adjacent hard surfaces (sidewalks, driveways, edging) — this accounts for the sod thickness so it sits flush after installation.
- Lightly water the prepared soil the day before sod installation — moist soil encourages immediate root contact. Don't saturate — muddy soil is hard to work on.
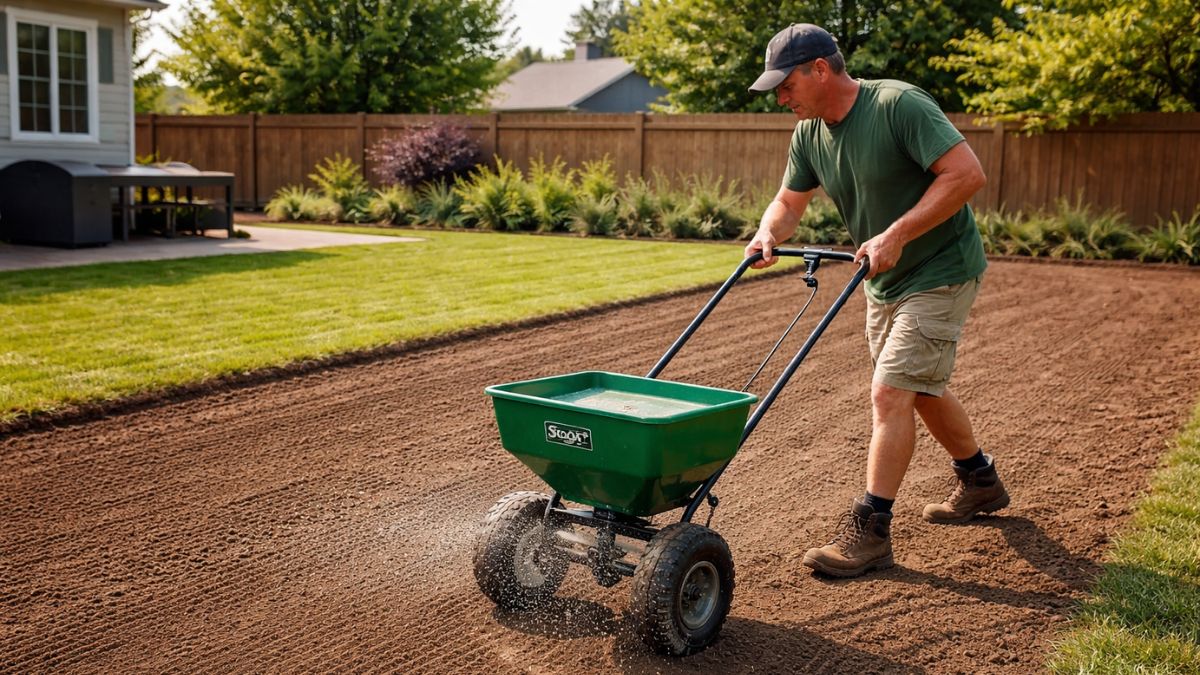
Starter fertilizer is applied to the soil surface immediately before laying sod. Unlike regular lawn fertilizer, starter fertilizer is high in phosphorus — the nutrient that drives root development in newly installed sod.
- Use a fertilizer labeled as "Starter Fertilizer" — look for a high middle number (phosphorus) on the bag, such as 12-24-8 or 10-20-10.
- Apply at the rate listed on the bag — typically 3–4 lbs per 1,000 sq ft.
- Spread evenly using a broadcast spreader or by hand for small areas.
- Apply immediately before laying sod — not days before. Rain or irrigation before sod goes down can wash phosphorus away.
- Do not apply high-nitrogen fertilizer at this stage — it promotes top growth before roots are established and can burn new sod.
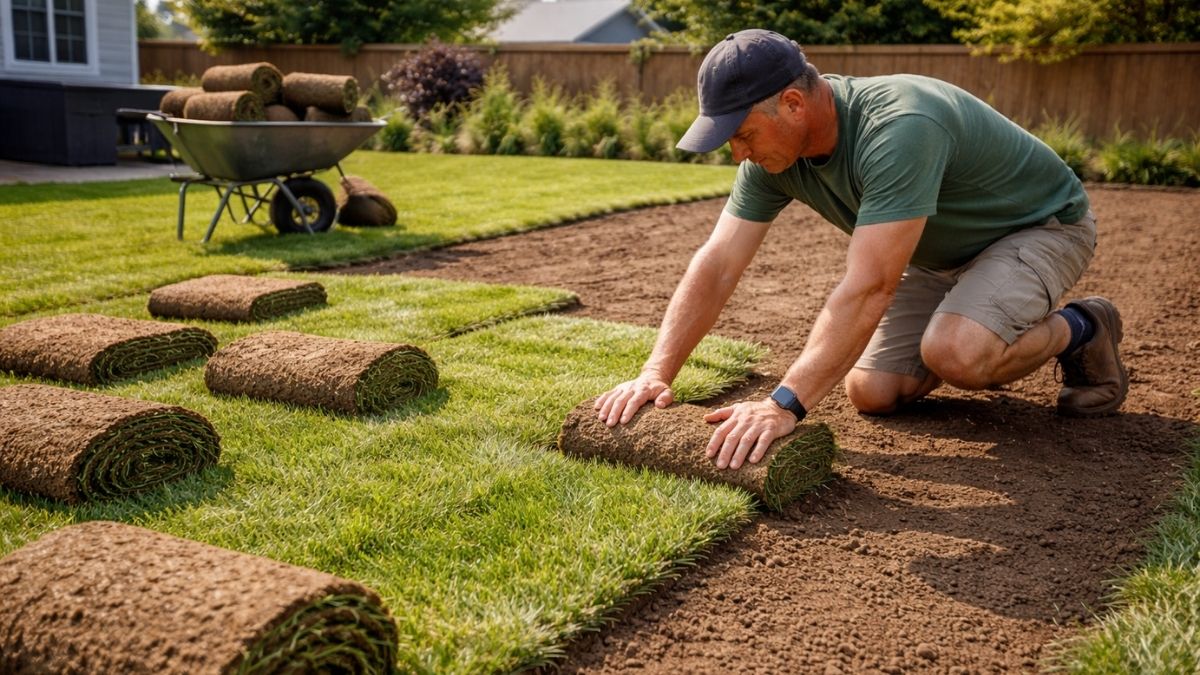
Now the satisfying part. Work quickly — sod placed on the first row can start drying before you finish the last row on a hot day.
- Start from a straight edge — a sidewalk, driveway, or property line. Lay the first row along the longest straight edge in your lawn.
- Place each sod piece by setting it straight down — never drag or slide it, which tears the roots and leaves gaps.
- Butt edges tightly together — gaps dry out and create dead strips. Push pieces firmly against each other with no space between joints.
- Stagger joints in a brick-like pattern — never line up end joints in adjacent rows. This prevents visible seam lines and adds structural stability.
- On slopes, lay sod across the slope (horizontally), not up and down. Use biodegradable sod staples on slopes steeper than 3:1 to prevent sliding before roots establish.
- Work from laid sod using a board or piece of plywood to kneel on — never walk directly on freshly laid sod.
- Cut pieces to fit edges and curves with a sharp knife or sod cutter. Cut pieces should be at least half a full piece — small scraps dry out too quickly.
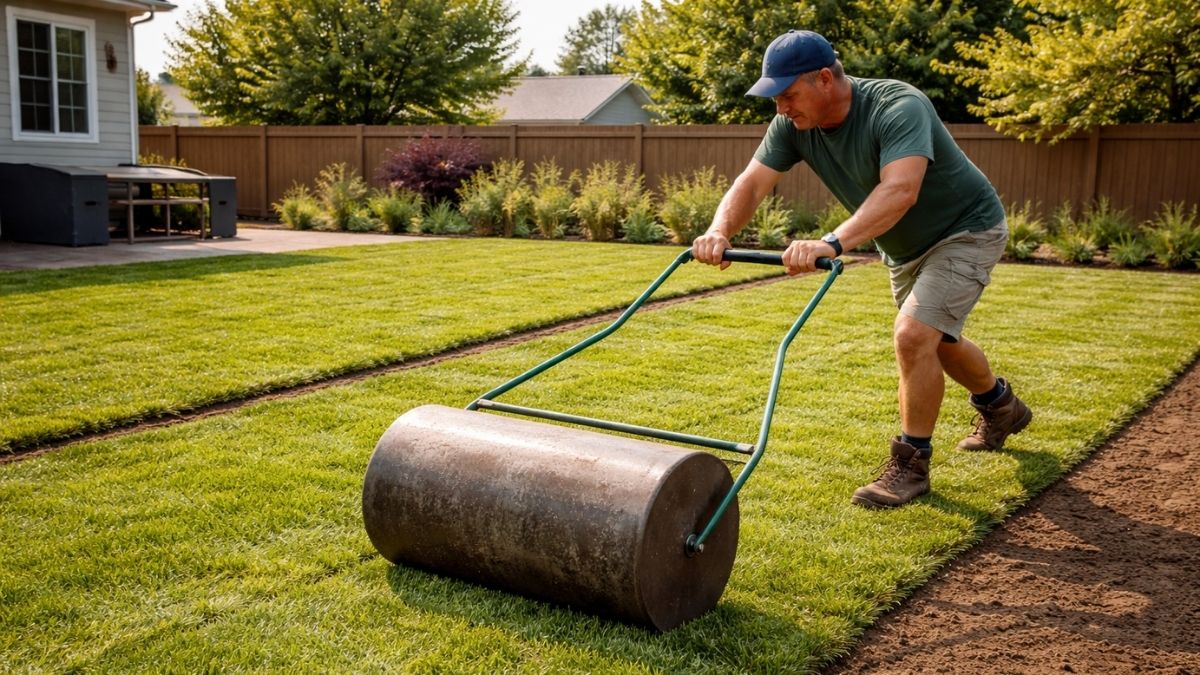
Rolling the sod immediately after laying is one of the most important steps beginners skip. A lawn roller presses the sod roots into firm contact with the soil below — essential for rapid rooting.
- Rent a lawn roller from any home improvement store or equipment rental for $30–$50/day. Fill it halfway with water for the right weight.
- Roll the entire sod area in two directions — once horizontally and once vertically — to ensure complete soil contact.
- Rolling also helps flatten any bumps or air pockets that developed during laying.
- After rolling, inspect all seams and edges. Press down any lifted edges firmly with your hands.
- Water immediately after rolling — within 30 minutes of completing the entire installation.
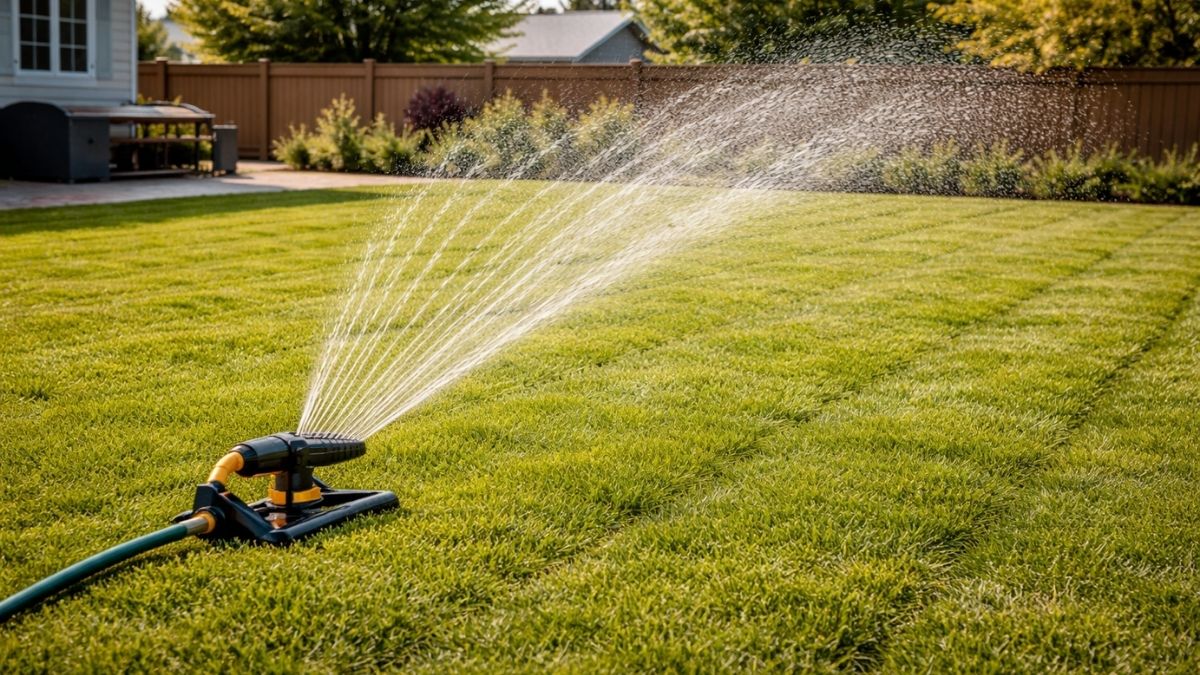
Watering is where most DIY sod installations succeed or fail. New sod has no roots — it depends entirely on irrigation to survive until roots grow into the soil. The first 2 weeks are critical.
| Week | Watering Frequency | Amount | Notes |
|---|---|---|---|
| Days 1–3 | 3–4× per day | Light — keep surface moist | Soil should be wet 3–4" deep |
| Week 1–2 | 2× per day (AM & PM) | Moderate | Check: lift corner — roots should resist |
| Week 3–4 | 1× per day (morning) | Deep — 1 inch per session | Roots establishing — reduce frequency |
| Week 5+ | 2–3× per week | 1 inch per week total | Normal established lawn watering |
Additional Care During Establishment:
- No foot traffic for 2–3 weeks — not even to water. Use a sprinkler, not a hose you walk with.
- First mow at 3–4 weeks when grass reaches 3–4 inches. Set mower to highest setting and never cut more than ⅓ of the blade height.
- Test rooting at 2 weeks by gently tugging a corner. If it resists, roots are establishing. If it lifts easily, keep the current watering schedule.
- First full fertilization at 6–8 weeks with a balanced lawn fertilizer once roots are fully established.
- Watch for dry spots — edges and corners dry out faster than the center. Hand-water these spots as needed.
Material Cost Breakdown (2026)
Here's a typical material cost breakdown for a 2,000 sq ft sod installation (DIY labor, materials only). Use our calculators to get exact quantities for your specific lawn size.
| Material / Item | Quantity | Unit Cost | Total Est. |
|---|---|---|---|
| Tall Fescue Sod | 2,100 sq ft (+5%) | $0.30–$0.65/sq ft | $630 – $1,365 |
| Starter Fertilizer | 2 bags (15 lb each) | $20–$35/bag | $40 – $70 |
| Topsoil (if needed) | 2–4 cu yd | $25–$45/cu yd | $50 – $180 |
| Lime / Sulfur (if needed) | 1–2 bags | $15–$25/bag | $15 – $50 |
| Sod Cutter Rental | ½ day | $80/day | $40 – $80 |
| Lawn Roller Rental | 1 day | $30–$50/day | $30 – $50 |
| Rototiller Rental | ½ day | $60–$100/day | $30 – $50 |
| Total DIY Cost | $835 – $1,845 | ||
| Professional Install | $0.75–$1.70/sq ft | $1,500 – $3,400 | |
*Based on 2,000 sq ft lawn with Tall Fescue sod. Prices vary by grass type and region. Bermuda is the most affordable at $0.25–$0.55/sq ft. Zoysia is the most expensive at $0.40–$0.80/sq ft.